
Local directories is a huge task for most people. With the use of Cacidi Extreme and the auto pagination engine called “AutoCalc”, Extreme are able to layout hundreds or thousand of pages with a very limited manual efforts. This tutorial will show you what you can achieve with just a data file, a small prescript to manipulate some of the data structure of the data, a templates and Cacidi Extreme.
The directory
This directory contains a list of owners of classic cars with all there contact information but also a list of the cars they own , which year, model, type and which kind of state they are in. The sur- and first name should be in bold, and address, zip, city and email i regular, this information should end with a tab and the phone number. After the owner information a list of all the vehicles with production year, brand, model, type and state they are in.
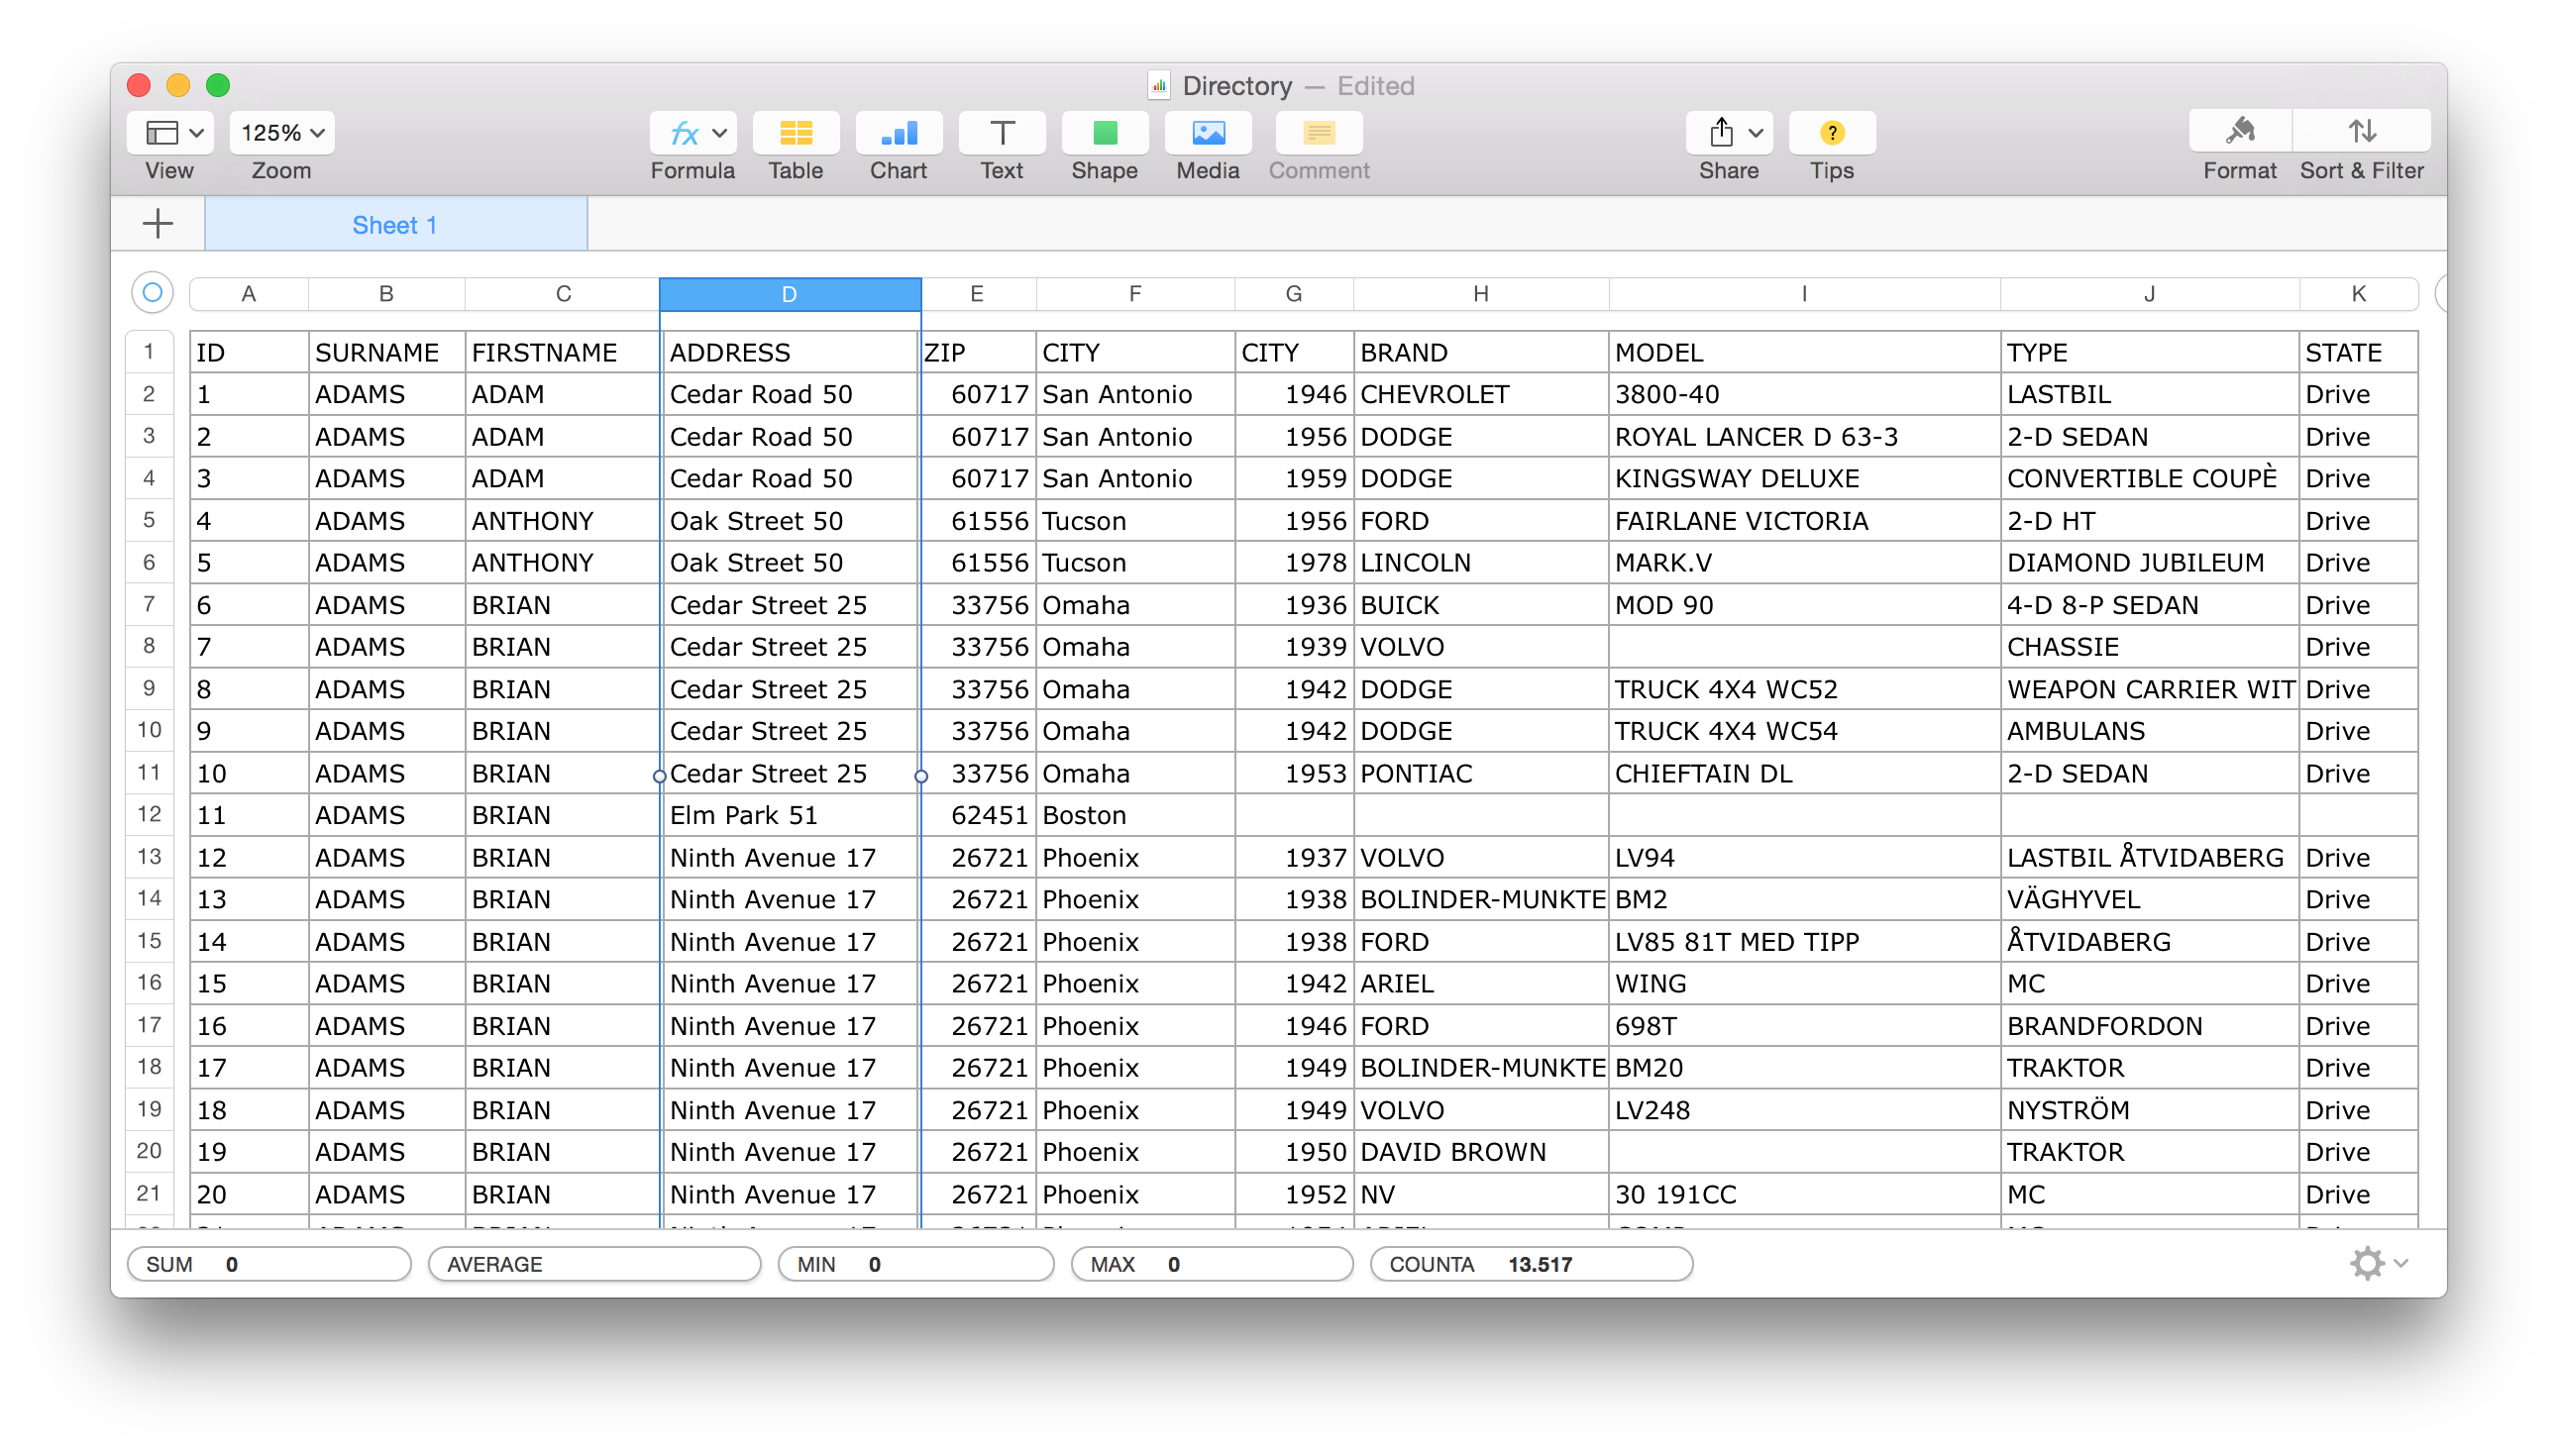
The first thing we will do is to take a look of the data. As you can se the data, in this case a tab separated file from Excel, has a list with the header name we will need to insert into the design to merge information data-to-design. For this tutorial we will be grouping data.

Setting up the data source
Enter the Project Settings dialog box, by choosing the “Project Settings” in the palette popup menu. When then dialog box are open select the “New” in the “Select a Base Settings” popup menu. Enter Directory as the name when prompted. Now make sure you have selected “File” in the data source selector. Now use the “…” 3-dot button right to the “File Name” file path field. Select the “Directory.txt” and press the “Refresh” button to load the file. If the file is not loaded, it could be because the file is open in e.g. MS-Excel, in that case , close the file in Excel. Now choose the right ID field, the folder for the Item Design, and the folder for InDesign templates.
The grouping and collection of information
A lot of persons in the list have more than one classic car, and the primary reason for creating this list are to create an overview, who got which cars?, To generate that kind of list we will be collecting data to a field we call “LOOP”. First you will have to make sure the data are sorted the way you want. Then select the field binding the cars together, in this case the address field can be used. Select the “ADDRESS” field in the “Group Field” popup menu, and now it’s time to select the field which should go into the list of cars:
[YEAR]<tb>[BRAND]<tb>[MODEL]<tb>[TYPE]<tb>[STATE]
Each cars will be presentet on it own line.
Save the project setting by exiting the project settings dialog box, by pressing the “OK” button.
 Creating the design for this production
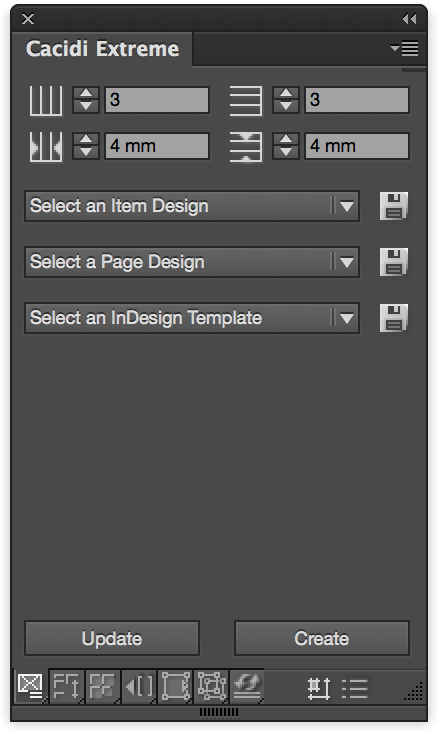
Start setting up the page grid, in this case there should be 2 columns and 1 row, the gutter should be 5mm both horisontal and versical. In the first column create a text frame covering the full tile. Insert your InDesign Text marker in the text frame, so that you are really to type in the frame.
 Insert data field in the text frame
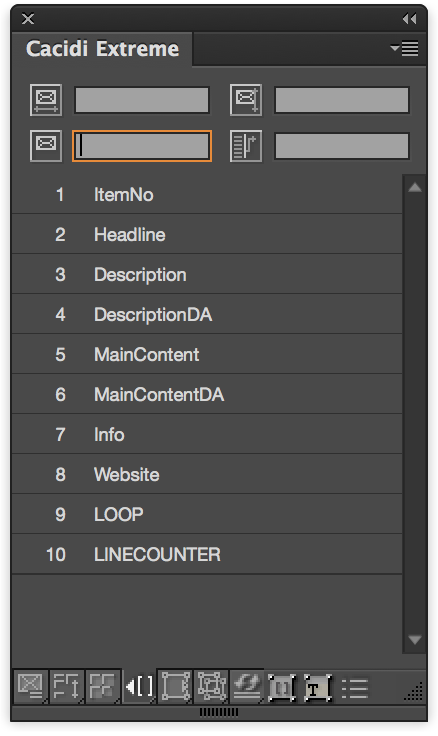
Navigate to the Text Link Panel by clicking the fourth icon at the bottom of the Extreme palette, Now click on the SURNAME, and watch that the [SURNAME] is inserted to the text frame, continue to all field used in the production are inserted: SURNAME, FIRSTNAME, ADDRESS, ZIP and CITY. For the SURNAME and the FIRSTNAME you should apply bold. On a new line below the personal information, insert the LOOP info. Save the design by selecting the frame with the black arrow (InDesign feature) and press the “Save” icon in the Extreme palettes first panel (the basic panel – first icon at the button). Use “Directory” as the design
Running a test as a step ‘n repeat
Make sure the design is selected in the popup menu, and the page grid is still 2 columns and 1 row, press the “Create” button. Let the production run a few seconds, the cancel the production by clicking the “Cancel” in the progress bar. If the design looks the way you want, continue with the “Prototype” AutoCalc, else go back to the Creating the design chapter.
 Setting up the “Prototype Placement-Inline” AutoCalc
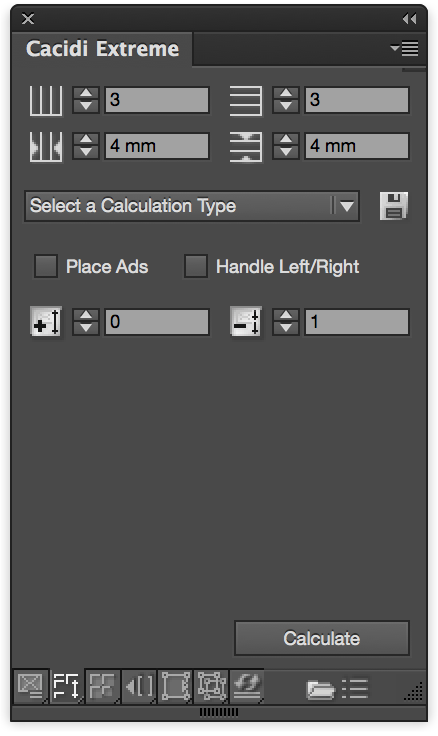
Go to the second panel, the “AutoCalc” panel of Extreme by clicking the second button i the bottom of the palette. Choose the “Prototype Placement-Inline”, then go to the “Text Link” panel by clicking the fourth icon at the bottom. Although there are four information in the top of the panal, we will only care for the Item Design which are in the first column below. Enter the name of the design you just created, the “Directory”. Go back to the “AutoCalc” panel, save the setup by pressing the save icon at the right of the “Select a Calculation Type”, you could name it “Directory”
Running the production
Select the calculation style you just saved in the “Select a Calculation Type” popup menu, the press the “Calculate”, and the production starts. All contents of the text frame with the design will be placed into the forth running text frame. Remember to wait until the full production is done for the pages to be produced. Enjoy!
Do you do catalogues like the yellow pages?
Ohh, Yes we do, you can use the prototype based pagination to place alle the adds in a floating inline production
Richard