
To create magazines with free floating text and image frames is a tedious task most designers will love to automate. This tutorial show you how to create several designs for easy drag ‘n drop to the InDesign template and with all text styling, connected to each data field, and automatically placing of images with basic scaling and position.
 Setting up the project
If you haven’t already setup the project, import/choose the “Magazine” project settings. The project itself are quite easy to setup from scratch: Point to you data source (choose connection mySQL, ODBC or file), for this tutorial we will use a small file with 10 pages and 10 records. Select the file “Magazine” by clicking the “…” button at the right side of file path. Then click the “refresh” to load the file to menory, and select the “ID” field i the “ID” popup menu. Now point to your image path. Continue by choose the folder for item designs (snippets) and the folder for InDesign templates. Leave all other fields empty.
Creating an InDesign template
To create an InDesign template, just select “New” in the file menu, set all you usual settings like page size, margins and decide if you are running with spread or single pages.
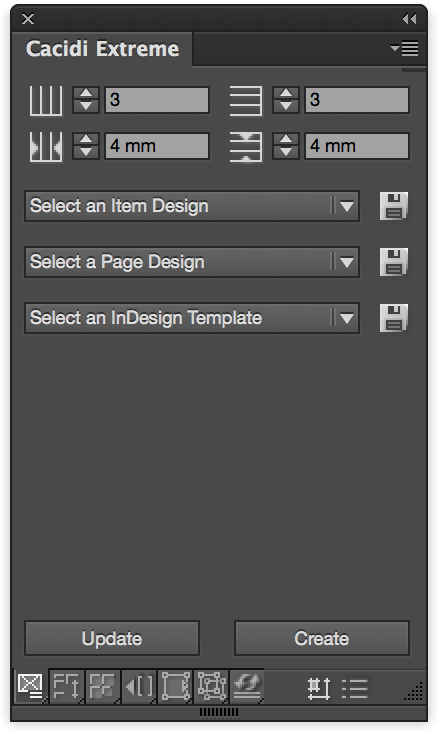 Setting the page grid (Only if you have Extreme)
Most magazines has a grid with just one tile on each page, so the page grid should be set to 1 column, 1 row and 0 mm in both horisontal and vertical gutter. Now the “scene” for product are ready.
Creating the first snippet
Now draw a number of text frames and image frames (image frames are those with a cross covering them), position them in the place you like (but on the page), now enter dummy text in the text frame, you can have “XXX” inserted for each time you want a merge field to insert data. Apply complete paragraph/character styling to all your “XXX”. Make sure everthing looks the way you like.
 Making the design ready for automated production
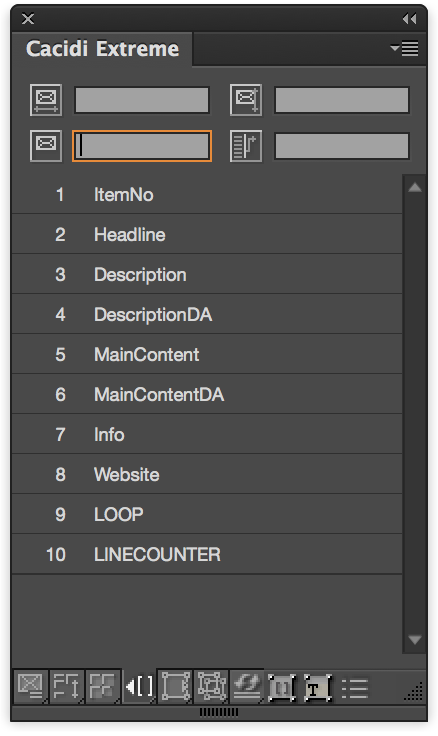
To connect data field in your design, right now visual by your “XXX”, you just need to double click the “XXX” so it’s selected, then navigate to the “Text Link Panel”, by pressing the fourth icon in the bottom of the Extreme palette, or fifth icon in the LiveMerge palette. This will present a listbox with all the fields from the data source, click in list and the merge field will replace the selected “XXX” but will have the same styling as the “XXX”. Continue to insert all the merge fields needed for your design.
Working with images
For images to be inserted automatically just select the image frame with the black arrow of InDesign. Click in the “Text Link Panel” on the merge marker that are pointing to your image name. The image name will be appended to the “Image Path” stated in the Project Settings. To set the scaling and alignment of the image, go to the “Frame Settings Panel”, at the below of the panel you can set how the alignment should be using the 9 dot left-center-right and top-middle-bottom position. The scaling of the images can be controlled by choosing “First Scale” (scale image proportionally within frame) or “Second Scale” (scale image to fill the frame proportionally).
 Scale Text dynamically (optional)
For magazine, the body text, the sub head are often the same for all pages, BUT the headline are often scale to fit the space that are available. By selecting the frame and navigate to the “Frame Setting Panel” you can controll how the scaling must occur. You can define the scaling values between minimum and a maximum of the point size for the first fields in the top of the panel.
Saving the Item Design
Select all the frames with the black arrow and a) LiveMerge: drag the frames to the panel, or b) Extreme: press the save button in the basic panel, right to the “Select and Item Design” popup menu. Remember to save the design to the folder the dialog box has selected for you – it’s the same folder you have selected in the project settings for use with Item Design.
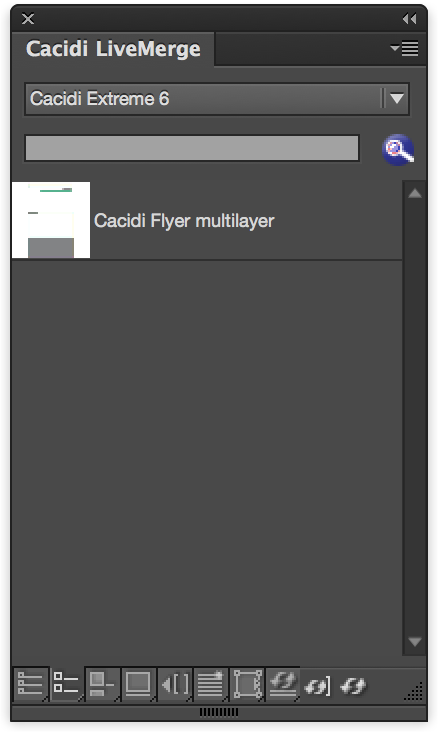 Dragging the design to the page (LiveMerge)
Shift the panel showing to the second panel icon at the bottom of the LiveMerge palette. The way this panel is working is to select the data record in the popup menu in the top of the panel, then drag the design to the page.
Placing every record with step and repeat (Extreme)
Make sure the design you just saved is selected in the “Select an Item Design” popup menu, and your grid is still set to 1 column / 1 row, and the gutter 0 mm for both horizontal and vertical. Then press the “Create” button.
Check the Item Designs
Watch carefully all details of the Item Design, if everything is not the way you want it, adjust the design to your specs. To do that you have to delete all pages but the first in the document, delete every frames on the first page. You can get edit an existing design by alt+drag the Item Design to the page (LiveMerge) or by selecting the Item Design in the “Select an Item Design” popup menu (Extreme). Re-save the Item Design when you are done.
Repeat and create all the Item Design needed
Continue to create more Item Designs, you can use the first design you created if it’s easier that re-create fra scratch.