
The most efficient way of working with data is to use a database, a database where all your data can be in but also be the place ware sorting and selection which data should be in your catalogue. With this tutorial we will show you how easy it is to setup the connection.
Go to the Project Settings, by choosing the “Project Settings” in the palette fly-out menu – for Extreme or LiveMerge, or by pressing the right most icon in the button of the “Basic panel” of the Extreme palette.
Creating a new mySQL connection
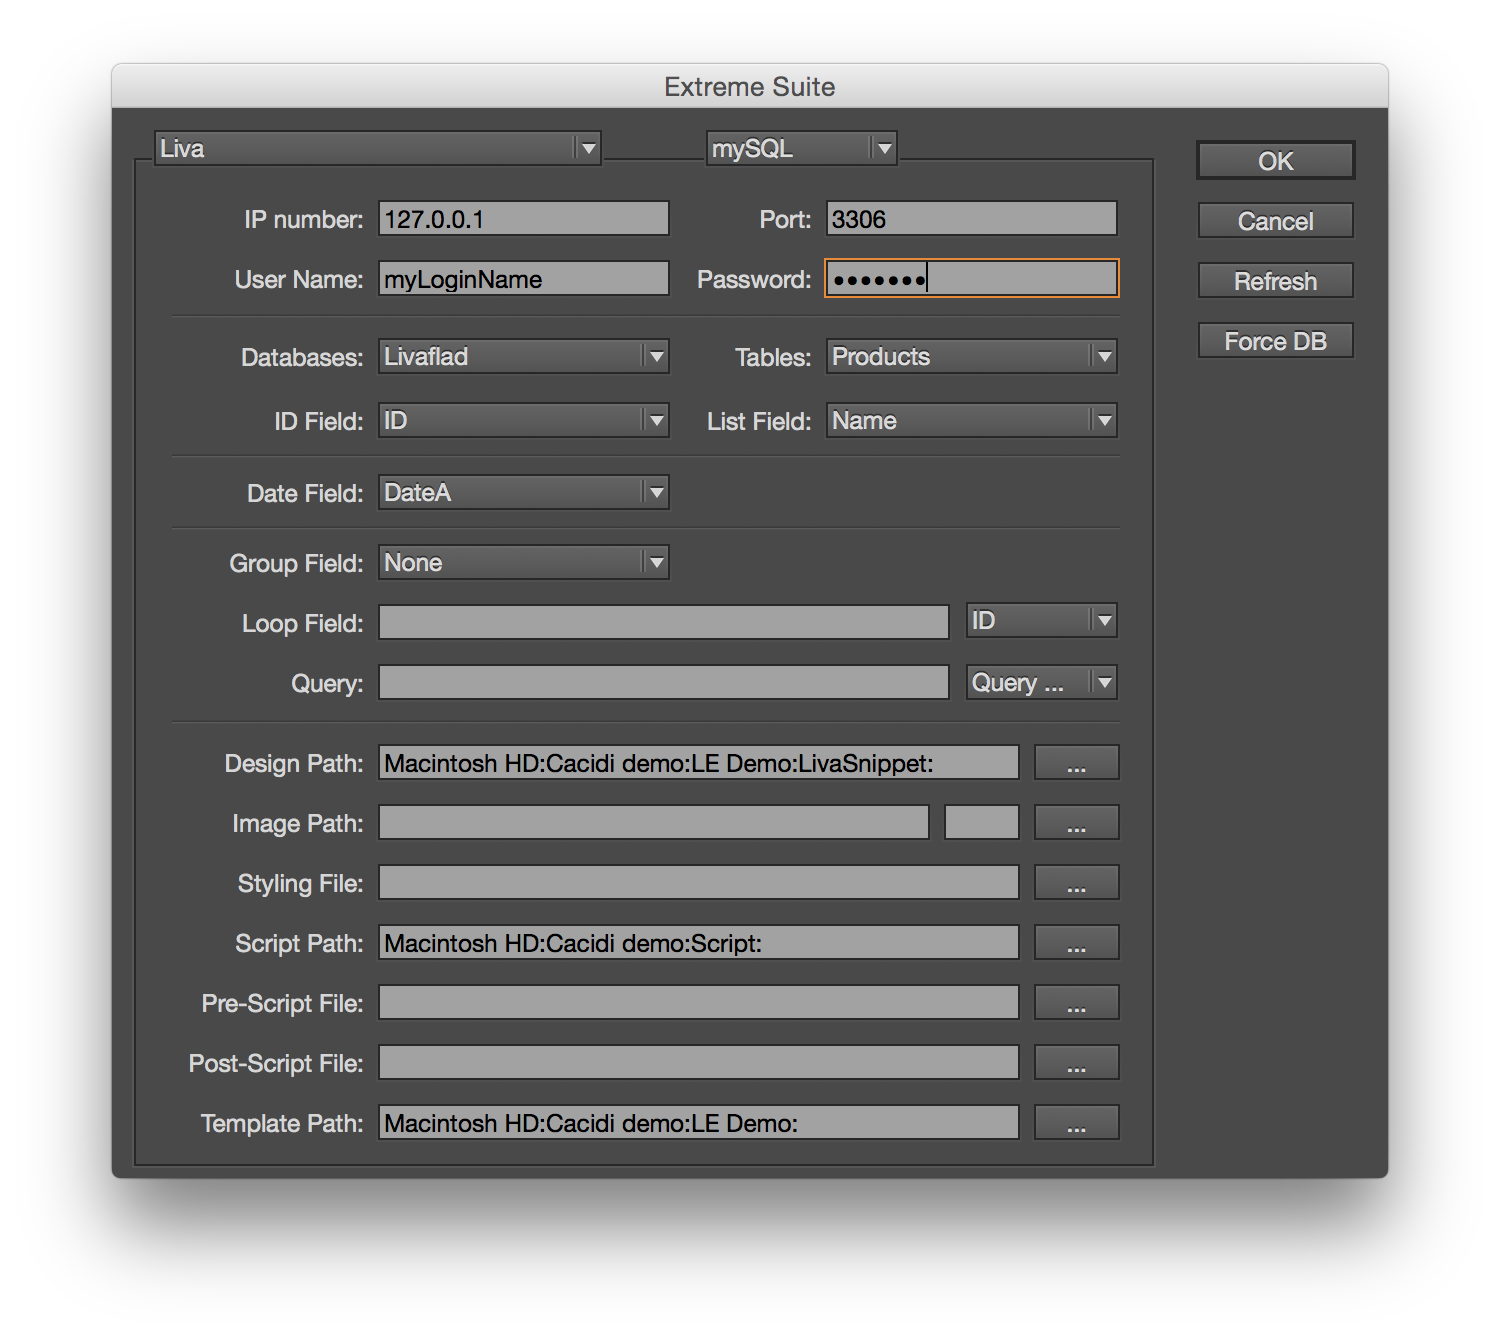
In the top left corner of the dialog box, you will find the “Select a base settings” popup menu, select the “New” and enter a name when prompted. Then select the mySQL choice in the connection popup menu, and the dialog box will change to give you the opportunity to enter connect base address and privileges. Start by entering the IP or DNS of you address, for my mySQL base local on my machine it’s 127.0.0.1, and the port is 3306, but if you have any doubt, ask the it department for the right info, then en your user name and password.
Establish the connection
Click the “Refresh” button, and the “Databases” popup menu will show the databases on the address, select the database that you will use for the production, and the “Tables”, will show you the tables you can connect to. When both the database and the table is selected, the field names or header names will be listed in the” ID Field” and “List Field” pop menues.
Selecting the appropriate ID field, List field and Data field
Whenever you need to update the data contents in your document, a ID field are necessary so the right record can by imported into the right frames. The List field are the contents that will go into the popup menu of the LiveMerge palette for easy selections of products. The Data field is a last modification data and is not required, but can be helpfuld for choosing which frames should be updated.
Advanced search facilities are available, use the “Query Helper” popup menu, for copying sql statement to the “Query” field, then modify field names to match your data source.