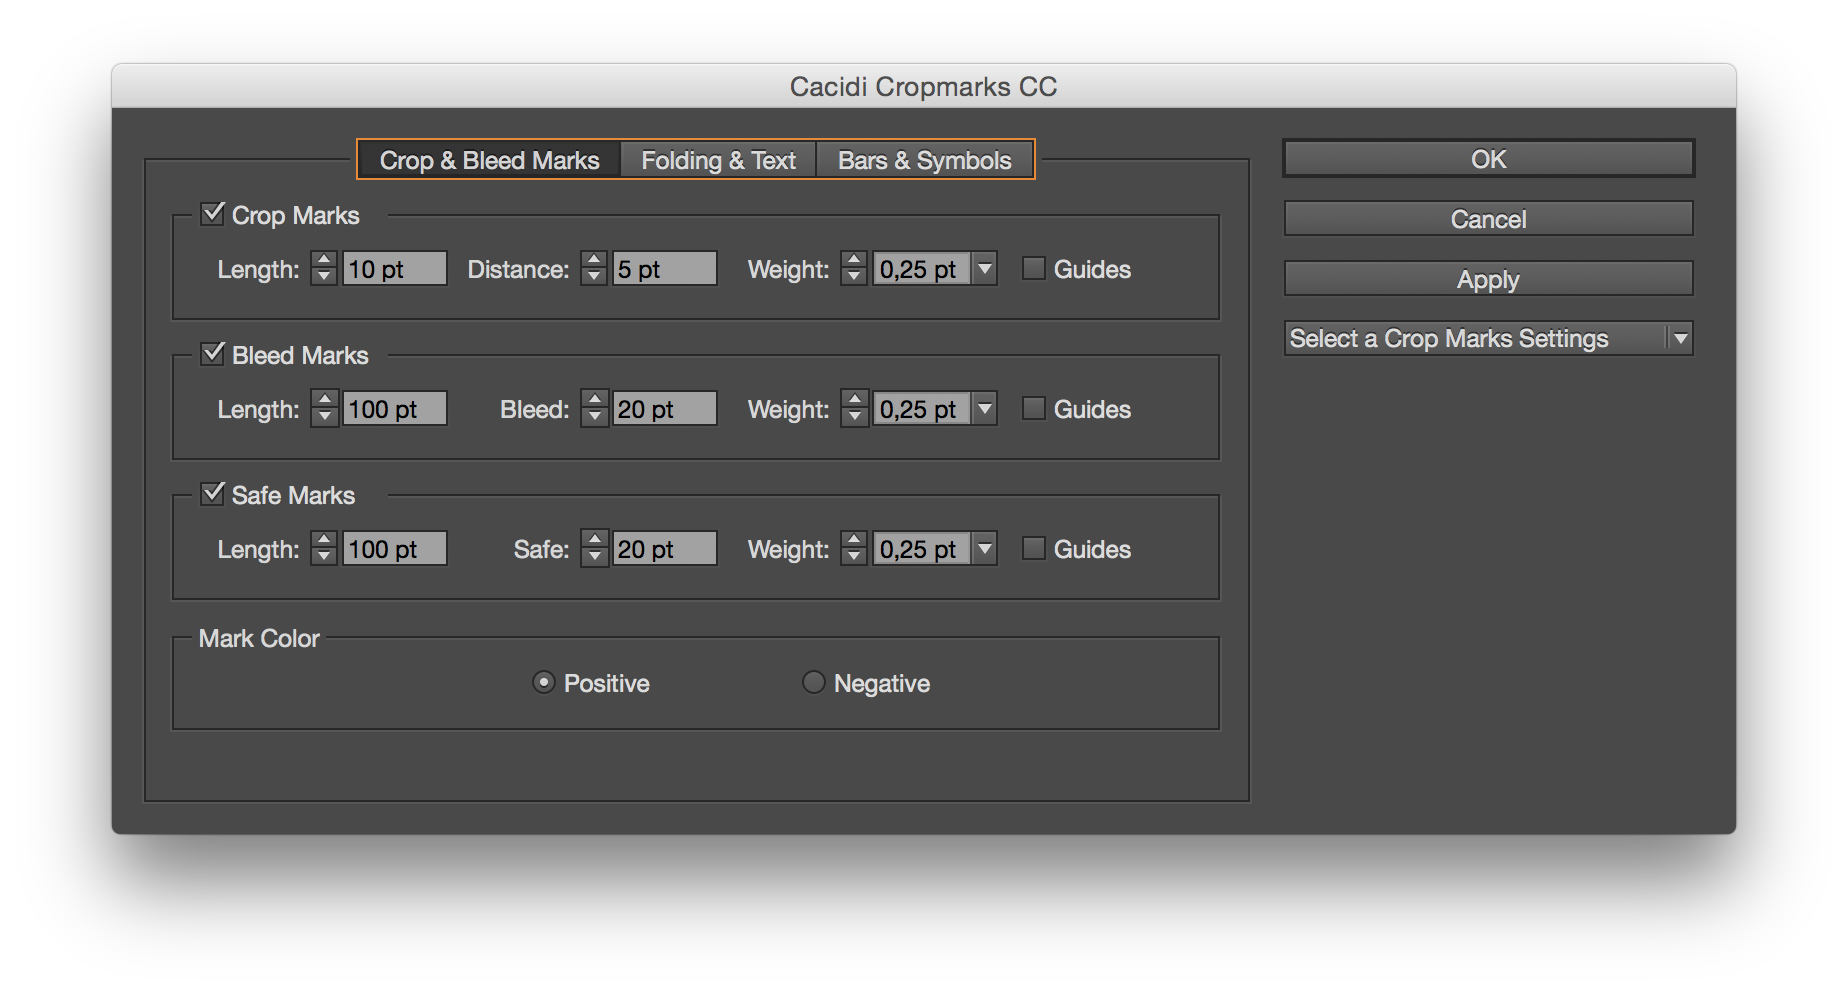
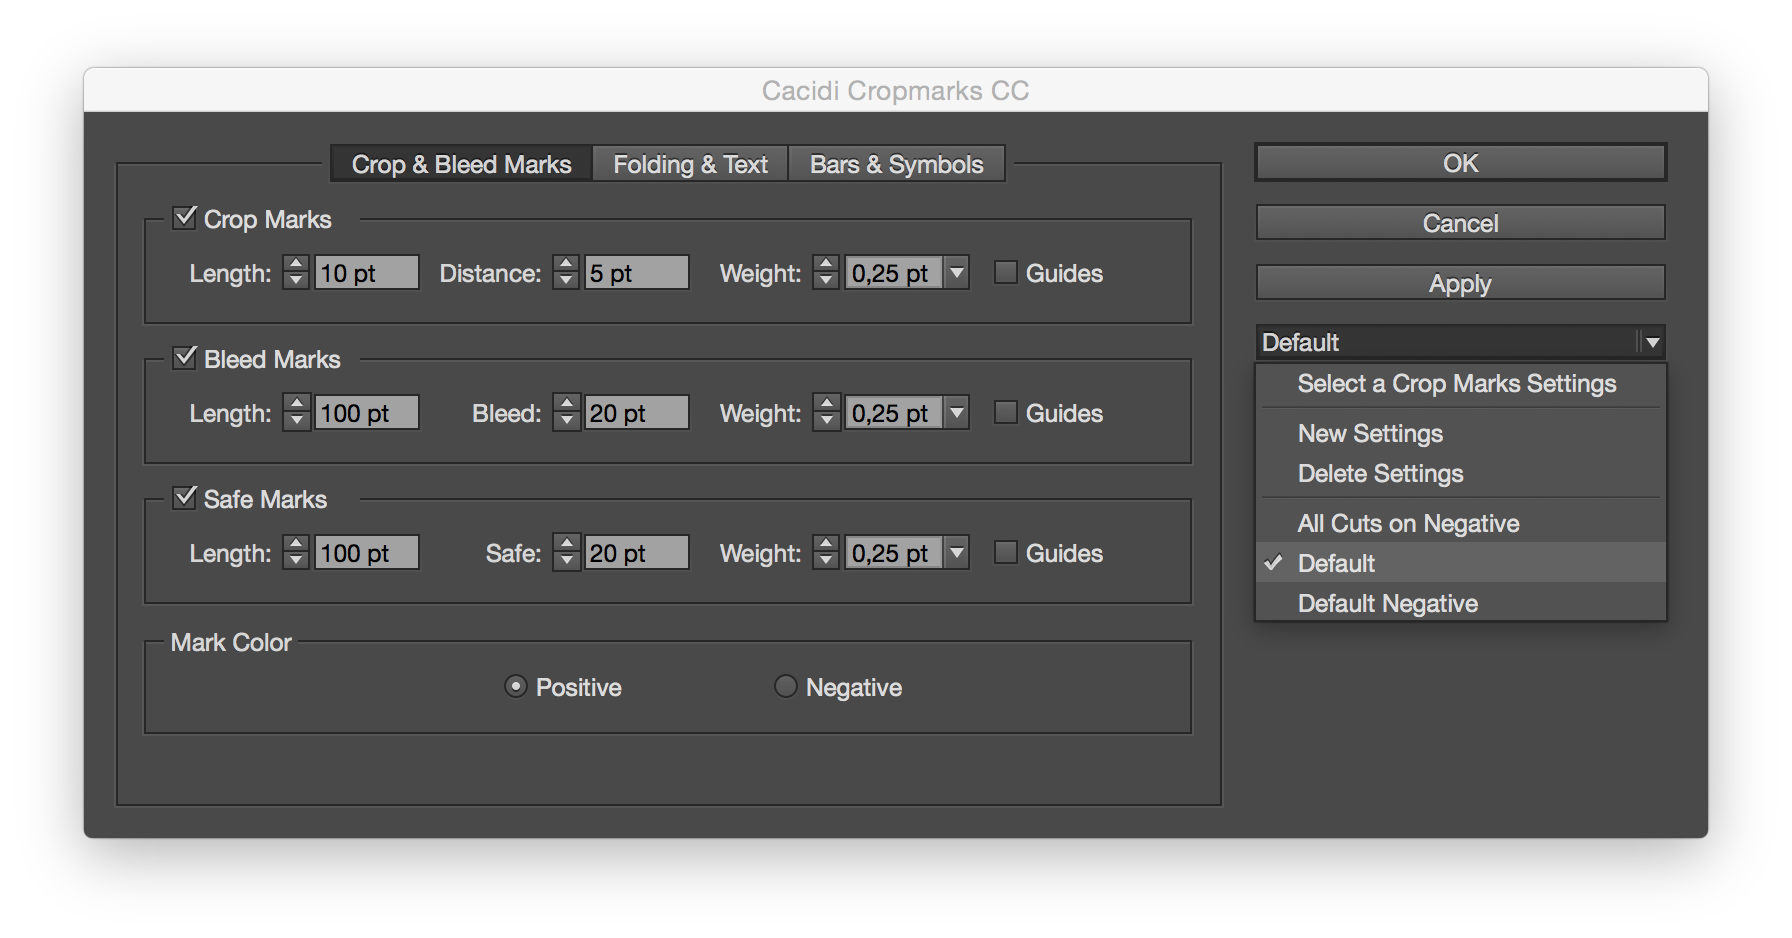
Today we are proud to announce the upcoming new Cacidi Cropmarks. Totally rewritten from the ground up, and filled with new fantastisc features. The “Old” version will only be available until we have passed the Public beta period which will expired by mid September. The new dialog box has three panels, the “Crop & Marks “, the “Folding & Text” and the “Bars & Symbols”. All information on these three panels can be save in a Setting, that makes it easy to select the most common types of crops, symbols and marks. The popup menu “Select a Crop Marks Settings”, gives (with the “New Settings”) the opportunity to save the settings of every widget on all the panels, and the just as easy “Delete Settings” gives an easy way of deleting a saved setting. As with the previous version the “Apply” button applies marks chosen in the dialog, and the setting don’t need to be save before they are applied to an object.
 The Crop & Marks panel
The panels gives three type of marks that can be applied, crop marks, bleed marks and safe marks. For all of them can be adjusted stroke weight, the distance to the selected object can be set and guides can be applied. A color global change be to positive or negative marks.
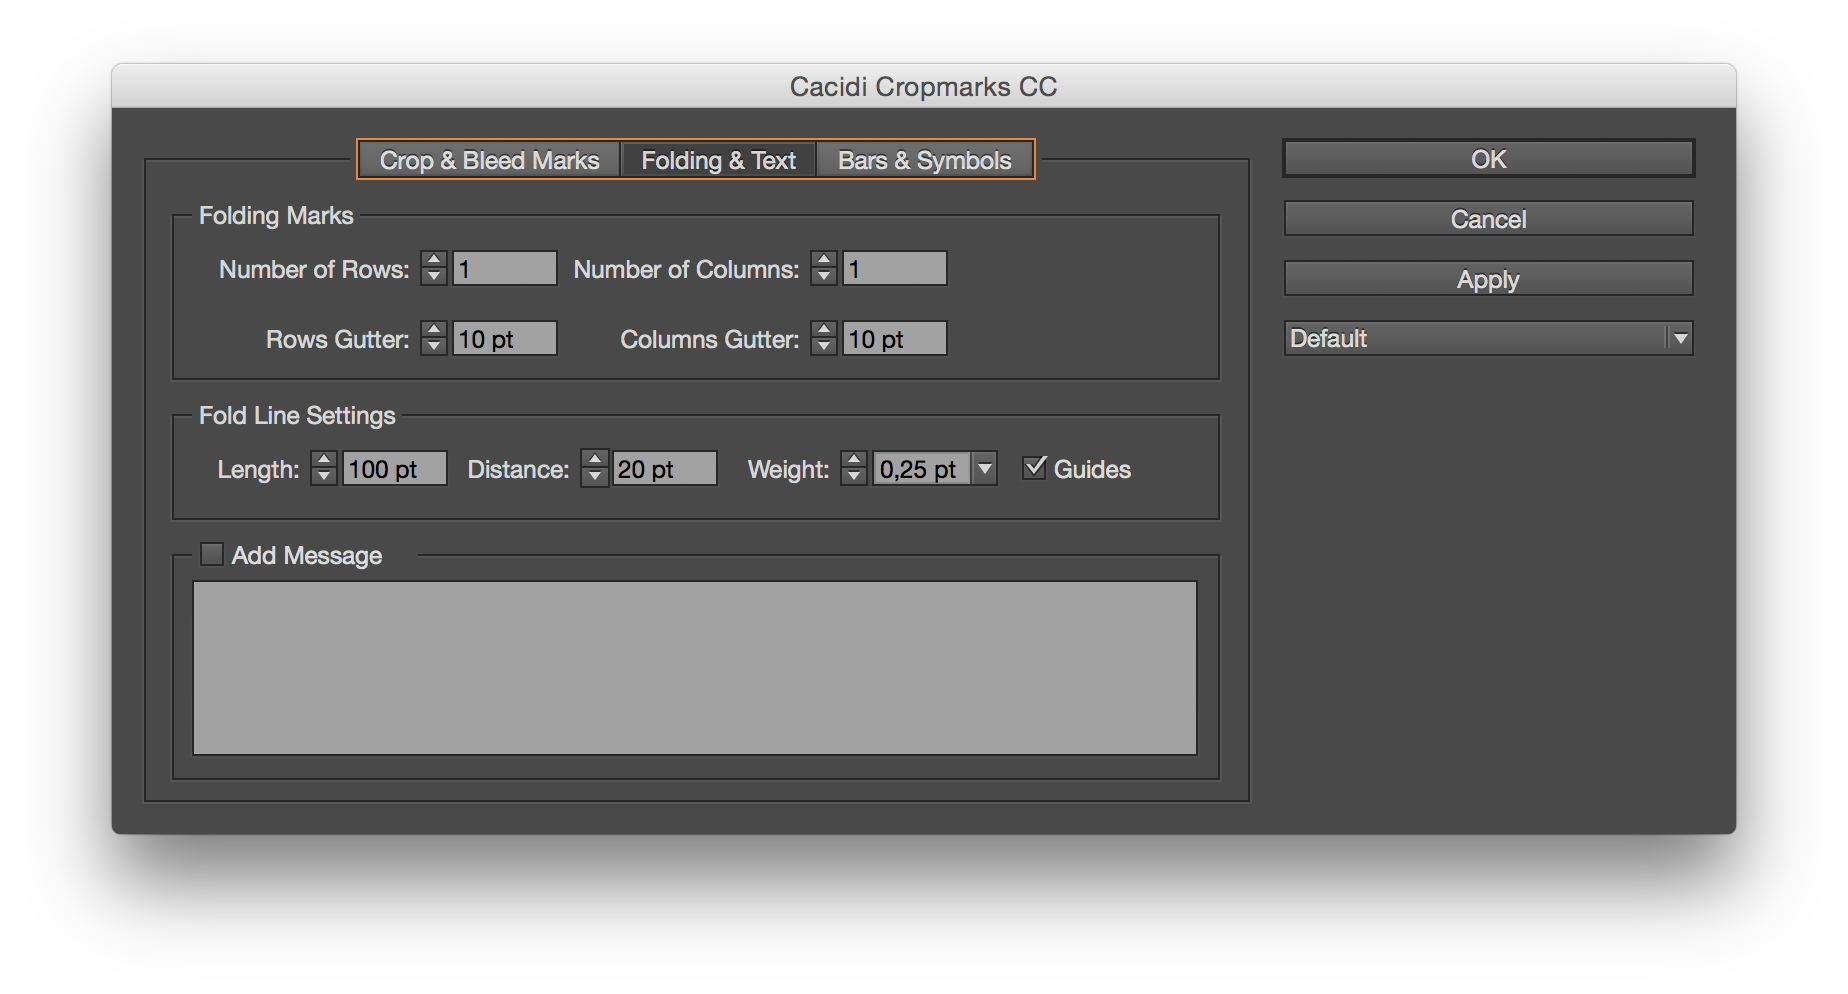
The Fold & Text panel
A grid for folding marks can be set. The number of rows and number of columns indicate the fold marks, and if the row cutter and column gutter is set marks will be added for gutters too. The size, stroke weight and if preferred guides can be . In addition to folding mark, you can also have a custom text area, for contact information, instruction and more.

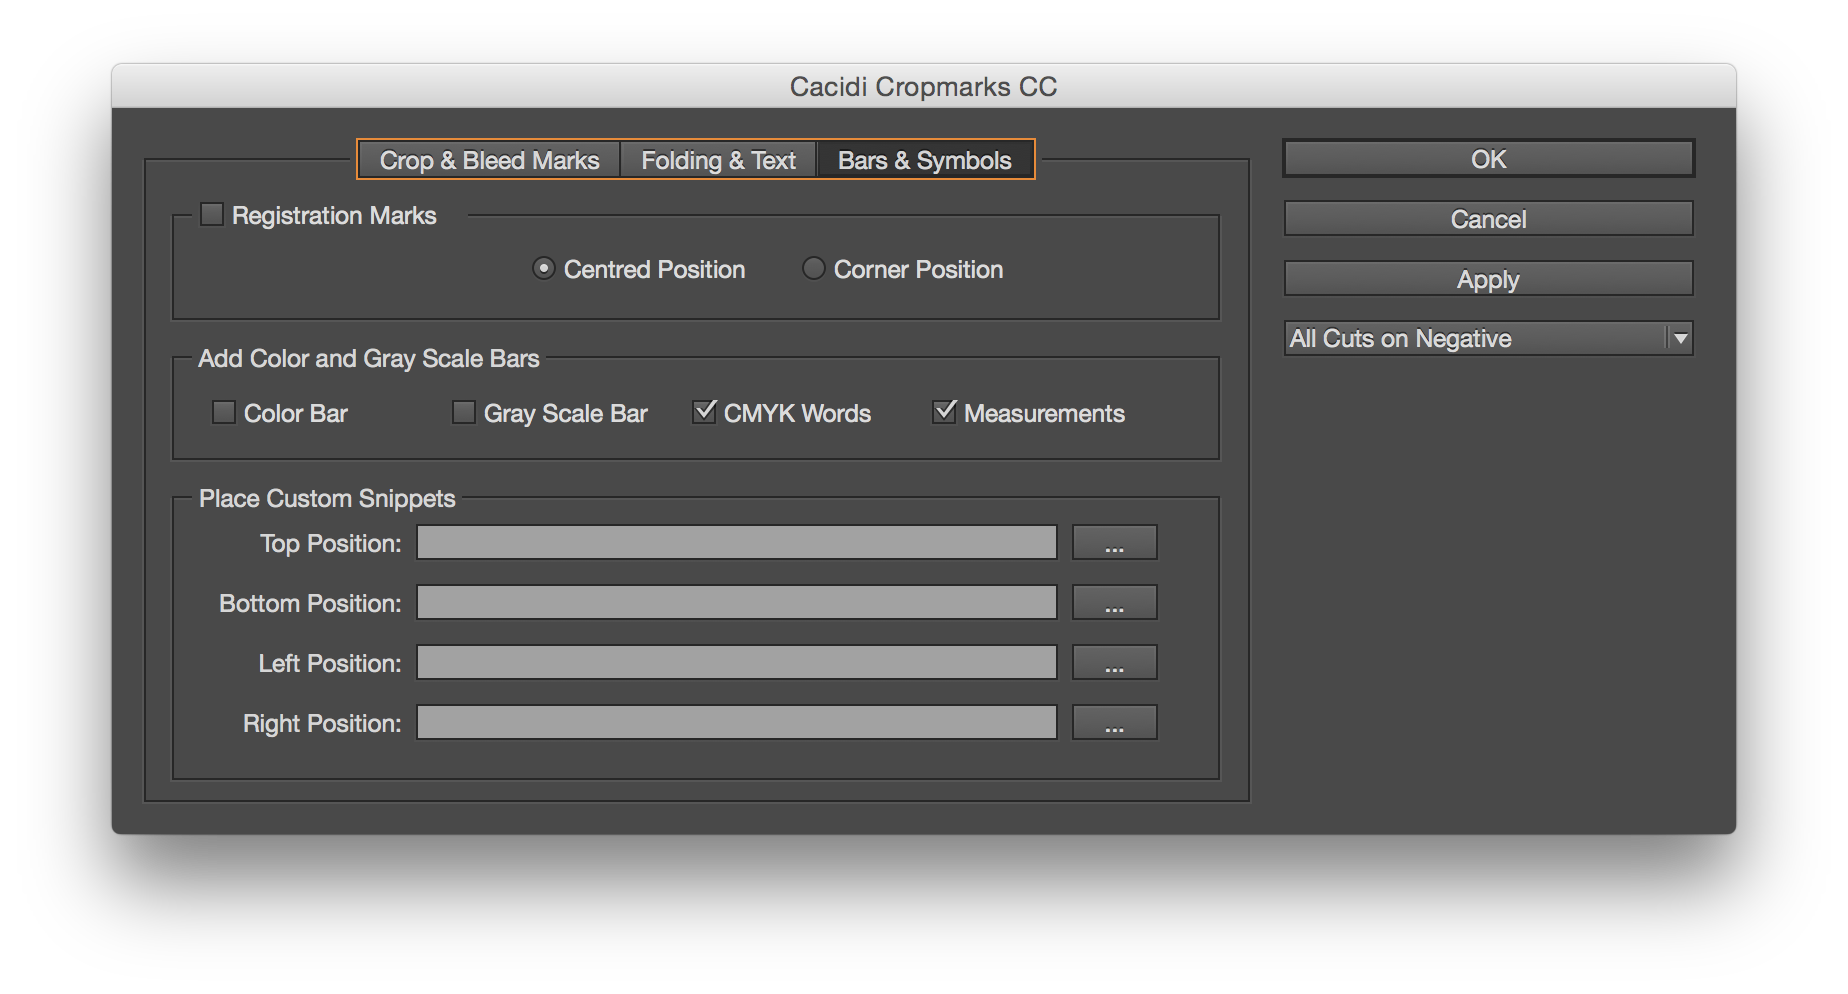
The Bars & Symbols panel
Registration marks can be selected and the choice for “Centred Position” or “Cornered Position” chosen. If negative is selected in the Crop & Marks panel, the registration marks color will be reverted. A color bar “Add Color Bar” with a 11 patches with 100% Yellow, Magenta, Cyan, Blue, Green, Red, Black and 50% Yellow, Magenta, Cyan and Black can be produced. And an option to “Add Gray Scale Bar” will produce a gray scale bar from 100 to 10% patches. If the select object is large enough to display these two bars beside each other they will be placed on top of the selected object. Else the gray scale bar will be placed on top of the object, and the color bar below the object. The “Add CMYK Words” will create a text box with the words “Cyan Magenta Yellow Black”, and the appropriate color is applied.
Measurements
When checking “Measurement” a line with arrows on the top and on the right side of the selected object will be added. A text frame centred on the line will indicate the width and the height of the object. The Units chosen for width and height will be inserted.
Place Custom Snippets
The Cacidi Cropmarks, also have the ability to place custom snipped on each side of the selected object. For each of the file path, a snippet can be placed, and the snippet will be placed the following rules.
The Top position snippet will be placed at the Top/Left corner of the selected object.
The Bottom position snippet will be placed at the Bottom/Right of the selected object.
The Left position snippet will be placed at the Left/Top of the selected object.
The Right position snippet will be placed at the Right/Bottom of the selected object.
All with 20 points margin.
Test the beta for 30 days free
You can download the forthcoming version of Cropmarks today. Use this serial number: 274-238-204-258, it will expire after September 15th. Download the software here. Please send comment to sales@cacidi.com. Thank for your support!
