
In this beginners lesson of our tutorials, you are going to create your first automated design from the very start. This means, you will simply open up a practically blank Adobe InDesign document and apply automation to a design you create yourself.
Select the “01-BusinessCard” project
In the ”Cacidi Extreme” palettes fly-out menu, select ”Projects” and ” ”01-BusinessCard”.
Your working project is now selected. To point to a datafile containing the data-field information you will use for the project, click the ”Text Link Panel” icon and you see the palette interface change.
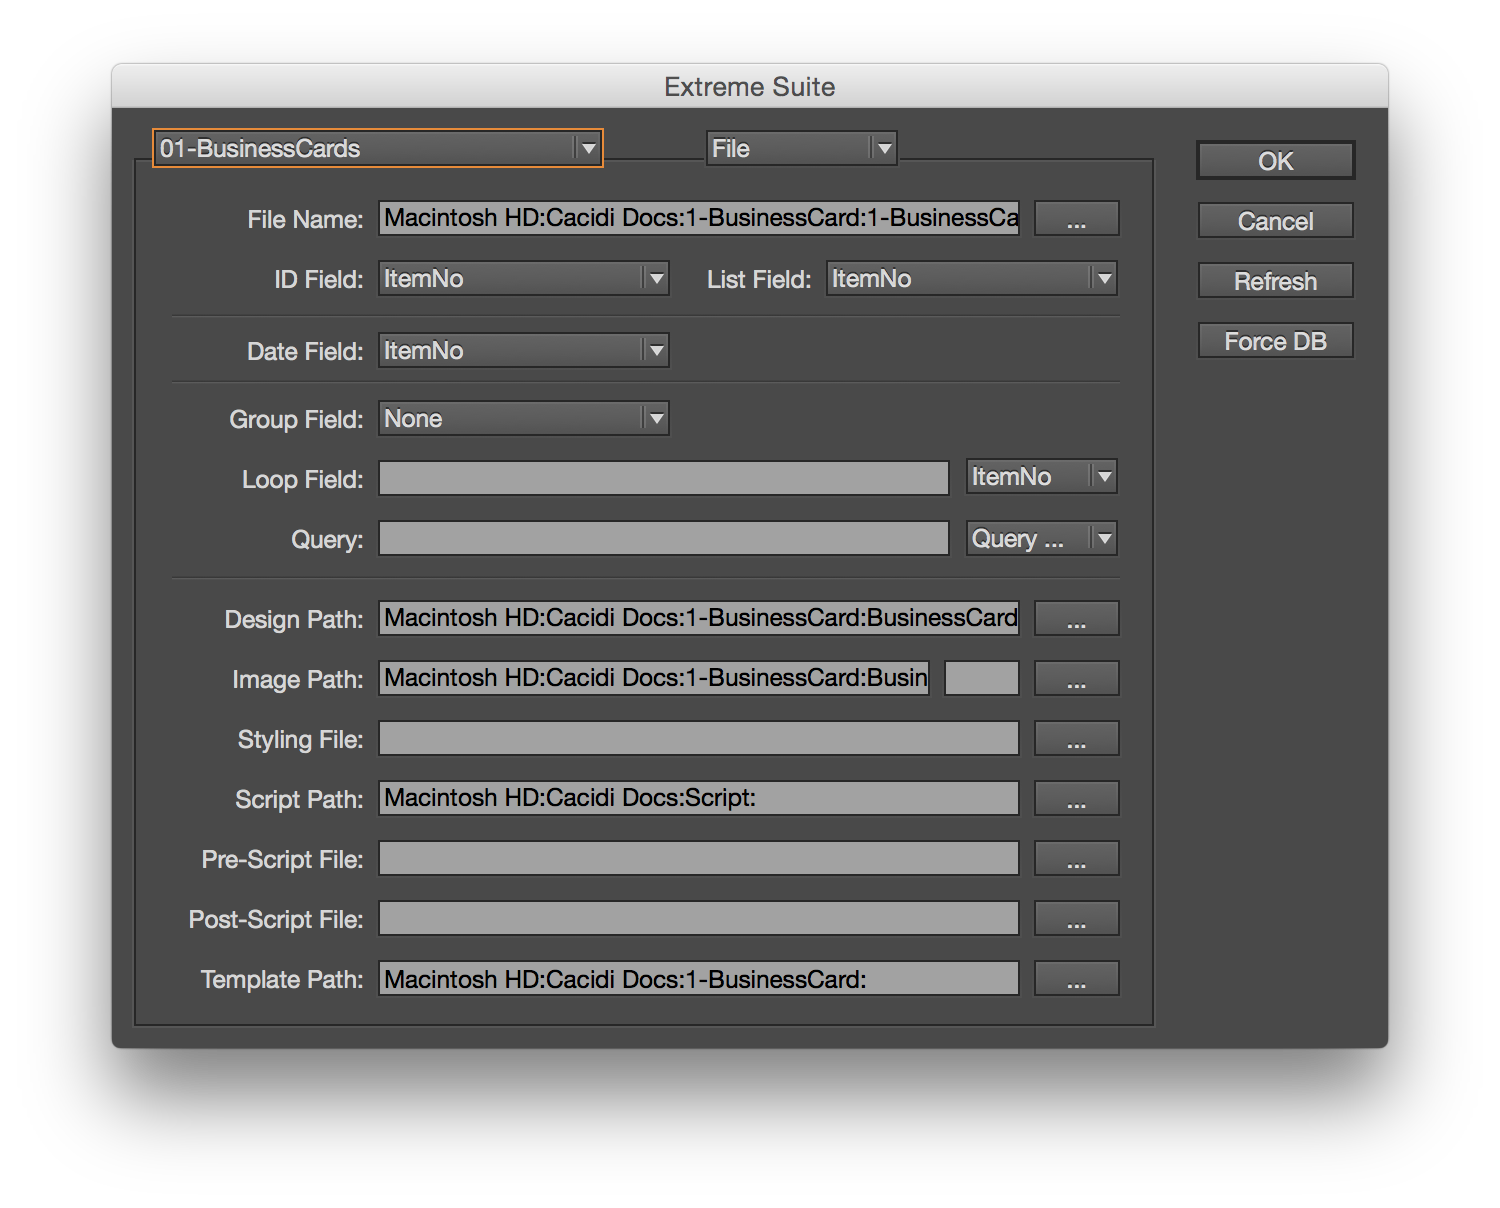
Everything are setup according to the location of your tutorial files.
Starting up the job
From the ”Cacidi Extreme” palettes ”Select an InDesign Template” pop-up menu, select the template named ”BusinessCards.indd”.
The template is a blank InDesign document containing only a grid of 8 tiles. Play around with the grid settings and gutter width settings in the top section of the ”Cacidi Extreme” palette. You see how the grid settings change in the layout, as you change the settings in the palette.
Bring the grid back to business card setting by entering the numbers:
Colums =2, Rows = 4, Gutter height = 20 and Gutter Width = 20.
Creating a business card design with Adobe InDesign
Use the InDesign text tool to create a text box in the first tile.
Enter some static text information like for instance “Graphic designer” followed by a return.
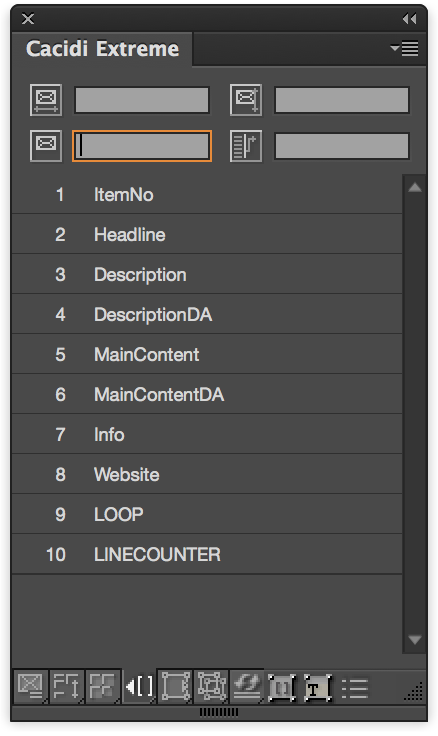 Now, click “Text Link panel” icon in the bottom of the Cacidi Extreme palette, select “Firstname” in the ”Merge Fields” scroll list (making sure your cursor is placed somewhere in the text box). Then enter a space with your keyboard and next select ”Surname” from the merge field scroll list.
Observe how all information you apply from the merge fields is applied [ ] characters. This means the text entries will later on be allowed to replace the placeholder with dynamic variable data from an external text file.
Finally, open the InDesign palette for ”Paragraph Styles”, and apply the paragraph style called ”Name” to all the text you just entered.
Working with images
Now that you have entered some static and dynamic text into the design, it’s time to apply an image, to be replaced by dynamic (or replaceable, if you like) image content when you in a minute automate the production.

With Adobe inDesign’s image frame tool, create a box in the top right corner of the tile and place the graphic ”Adobe.ai” (located within your ”BusinessCards images” folder in the ”Cacidi Docs” folder) into it.
Use the “First Scale” button in the “Frame Settings Panel” palette to scale and center the image in the box.
Applying automation functionality to the image box
Select the “Text Link Panel”, by clicking on the fourth button, in the bottom of the Cacidi Extreme palette. With the image box selected click “Image” merge field scroll list.
Saving the Item Design
Using InDesign’s selection tool (black arrow), shift click or drag around all those text and image boxes you wish to include in the “Item design”.
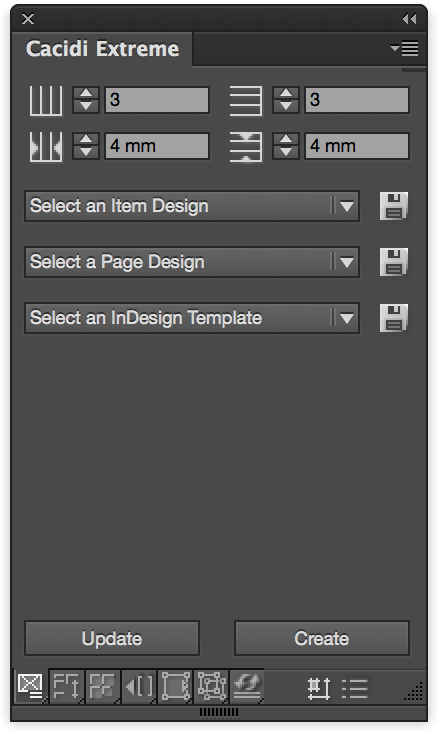 Next, click the disk icon next to “Select an Item Design” in the “Cacidi Extreme” palette and save the design in the project folder named “BusinessCards”, naming the file “MyBizzCardItem”.
Note: It is very important that you save your Cacidi Extreme Item Designs in the project folder you selected to start with, as Cacidi Extreme looks at this as a workspace when re-selecting the items from the palette pop-up menus. You will by default be pointed to the right folder if you remembered to select the “Business Cards” project earlier on.
Running the job
Next, to create the automated document, delete everything from the InDesign document and then select “MyBizzcardItem” from the Item Design pop-up menu.
You will now see your item design being brought back into your document with replacement text and images ,instead of the data you initially entered. This is correct!
Finally, click the “Create” button in the “Cacidi Extreme” palette, point to the “1-BusinessCards-UTF8.txt” file in the “Cacidi Docs” folder, and open this file through the dialog box.
If you followed all the previous steps, in just a few seconds you should see a page with 8 cards.