
Cacidi Cropmarks is the leading tool for creating all sorts of crop, bleed, safe marks and guides. The Cropmarks also gives a wide variety of different bars and symbols, and you can even create your own snippets and use as symbols and information blocks.
| Cacidi Cropmarks CC2023 | $52 per seat/per year | Add to Basket | Download Now |
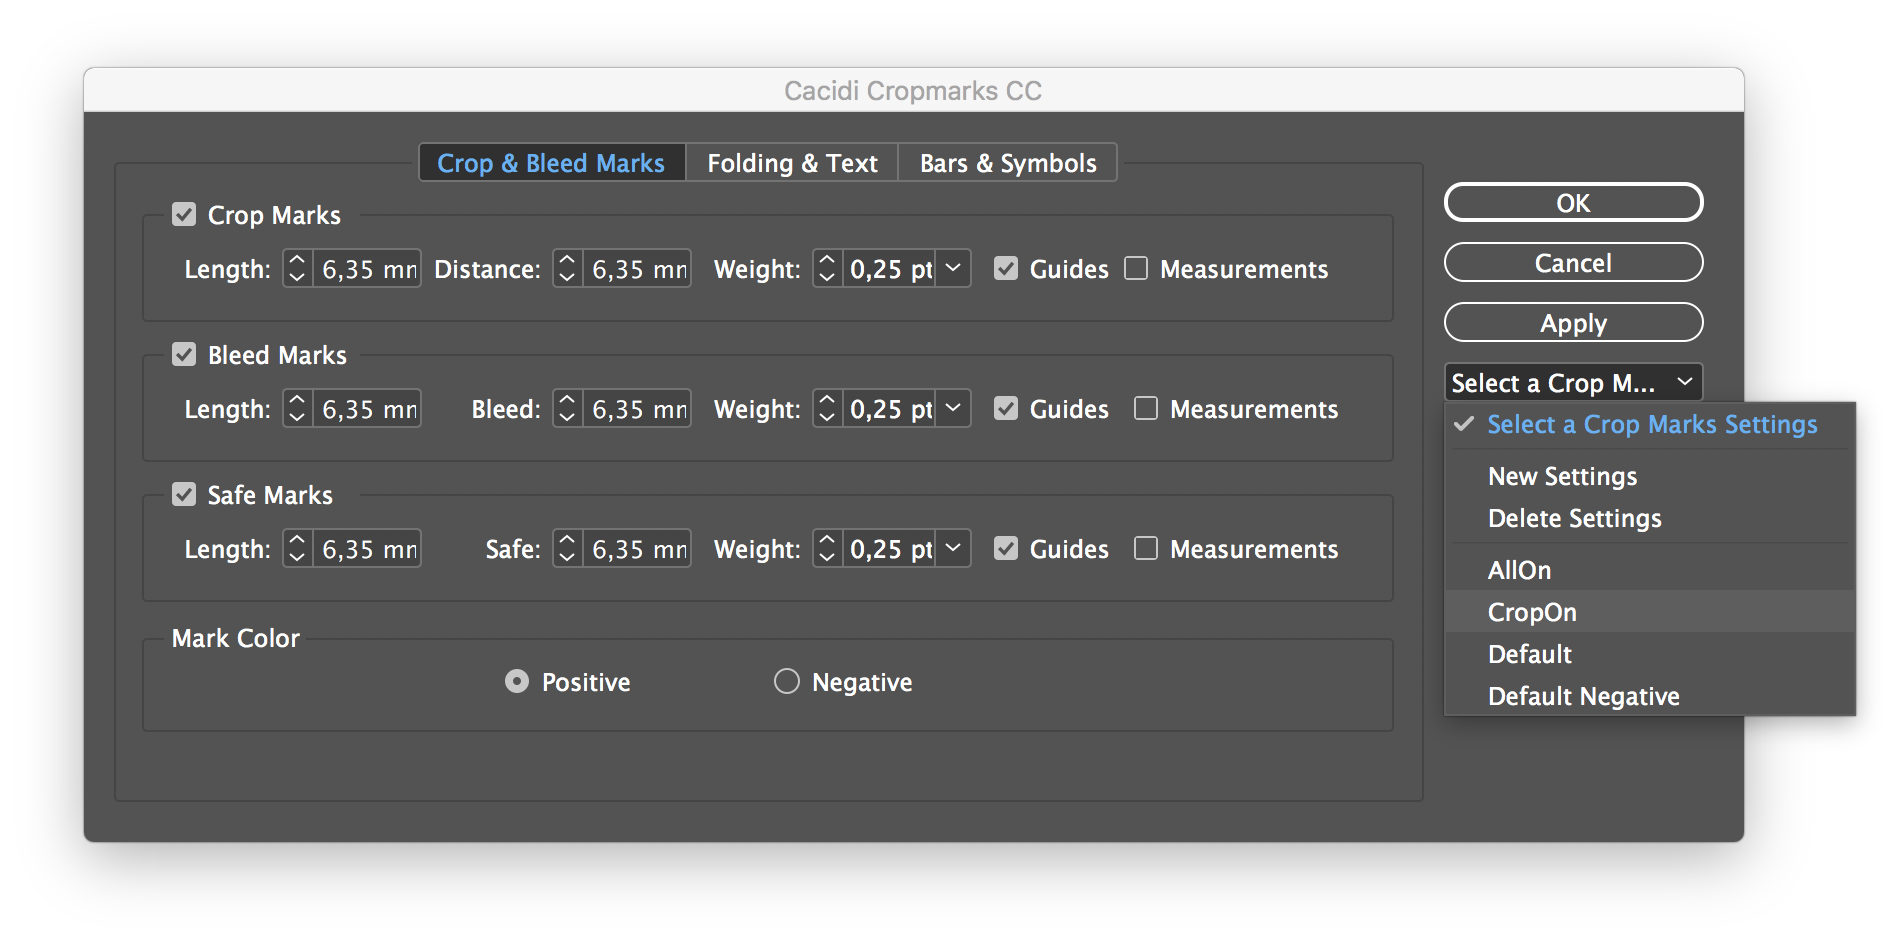
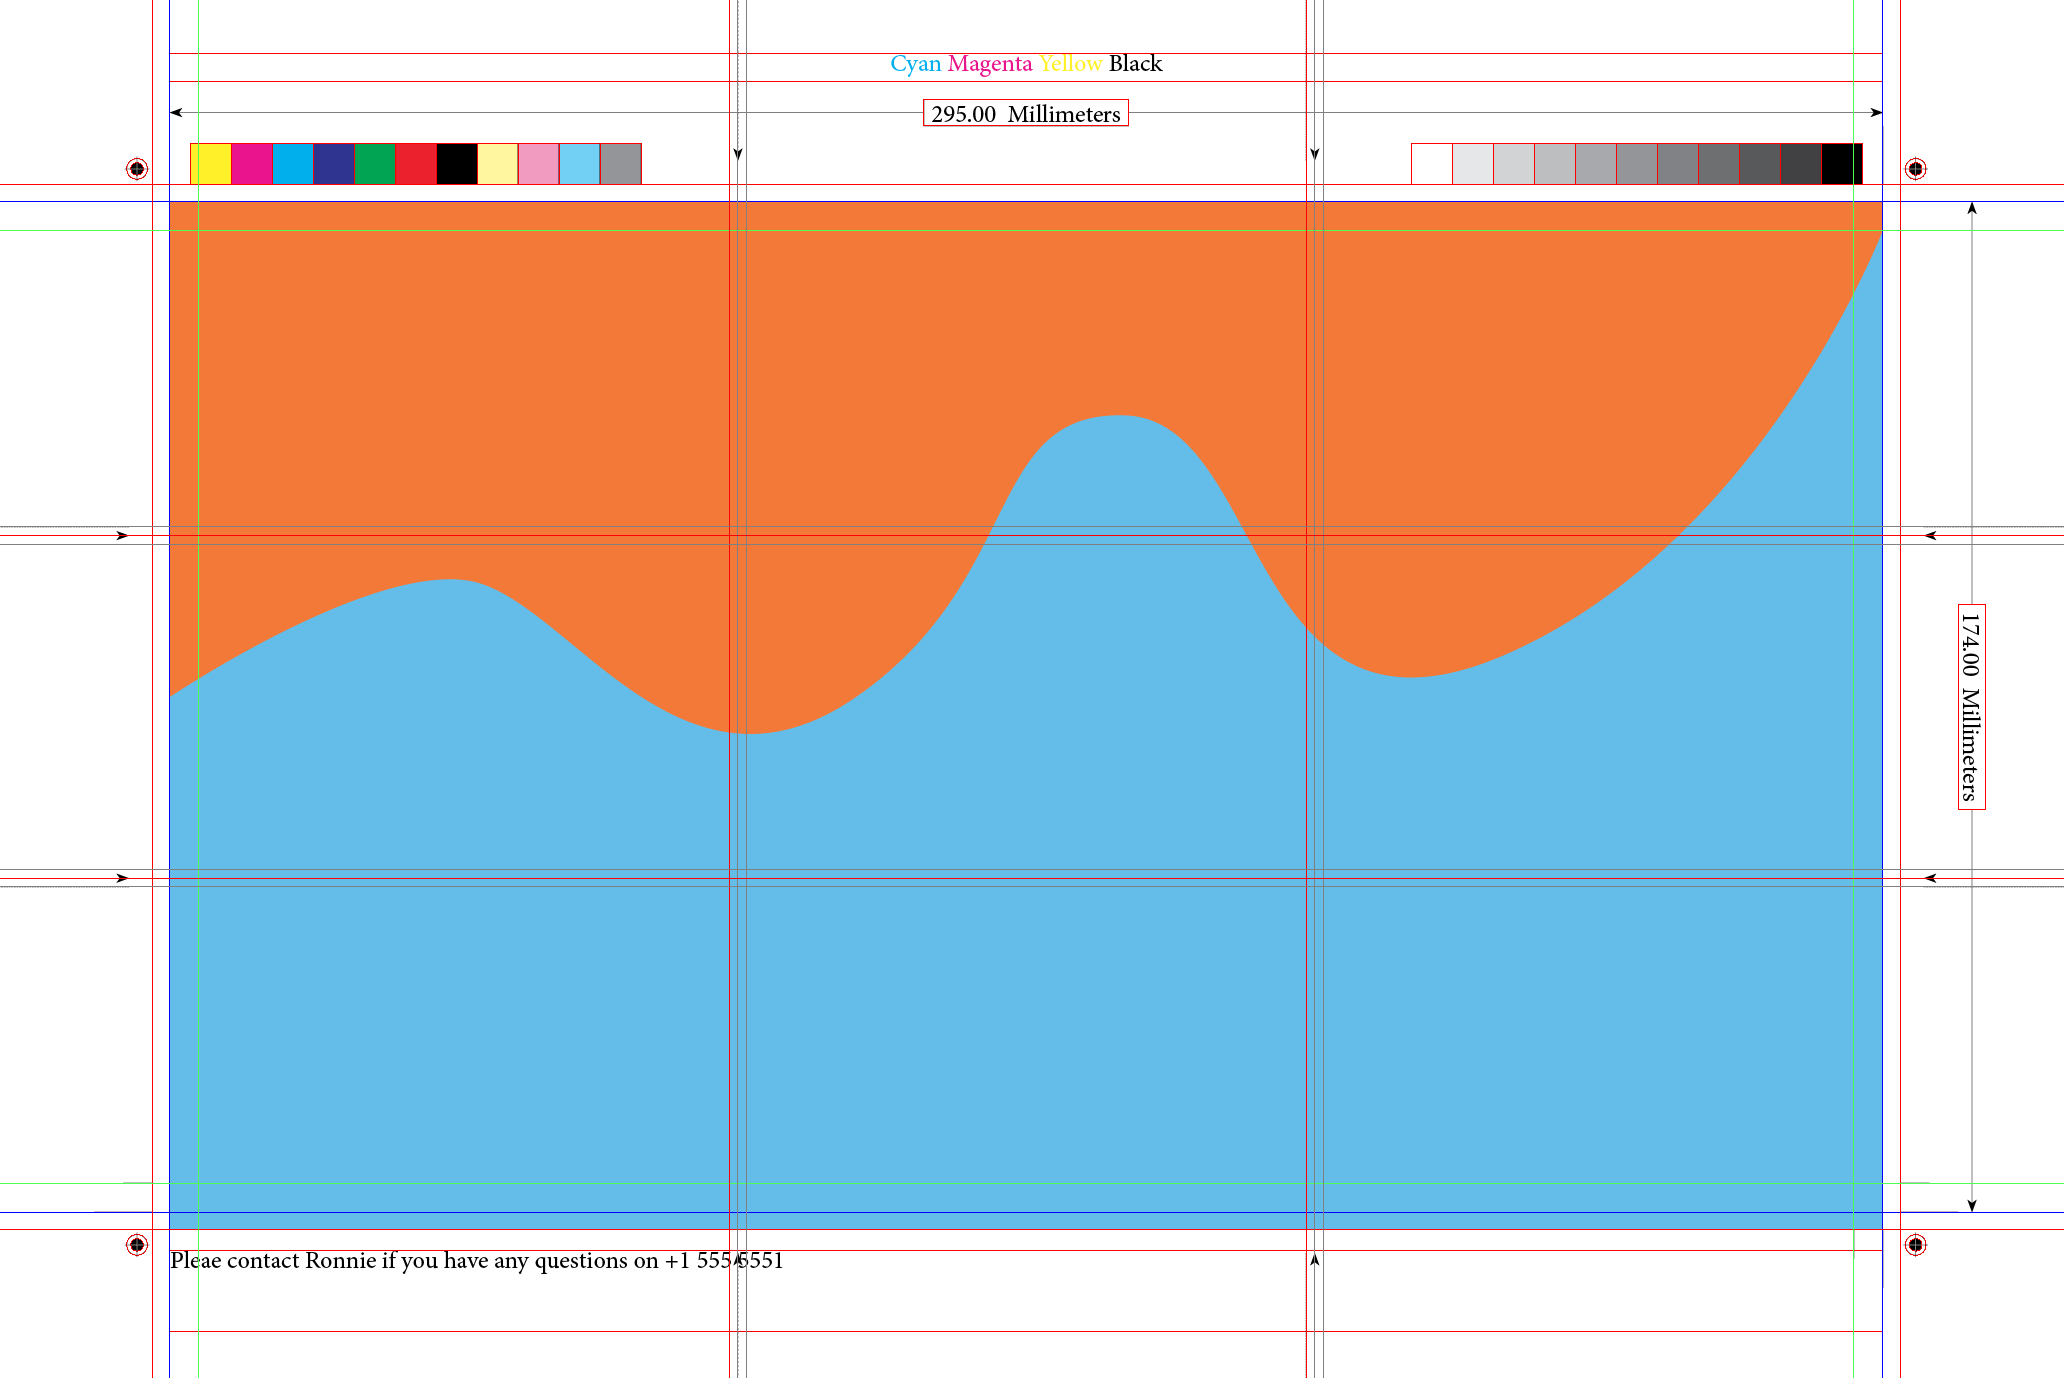
The Cacidi Cropmarks has three different panels Crop & Bleed Marks, Folding & Text, and Bars & Symbols. Each panel lets you choose between a number of different settings, and all these settings can be saved in the “Select A Crop Marks Settings” pop up menu.
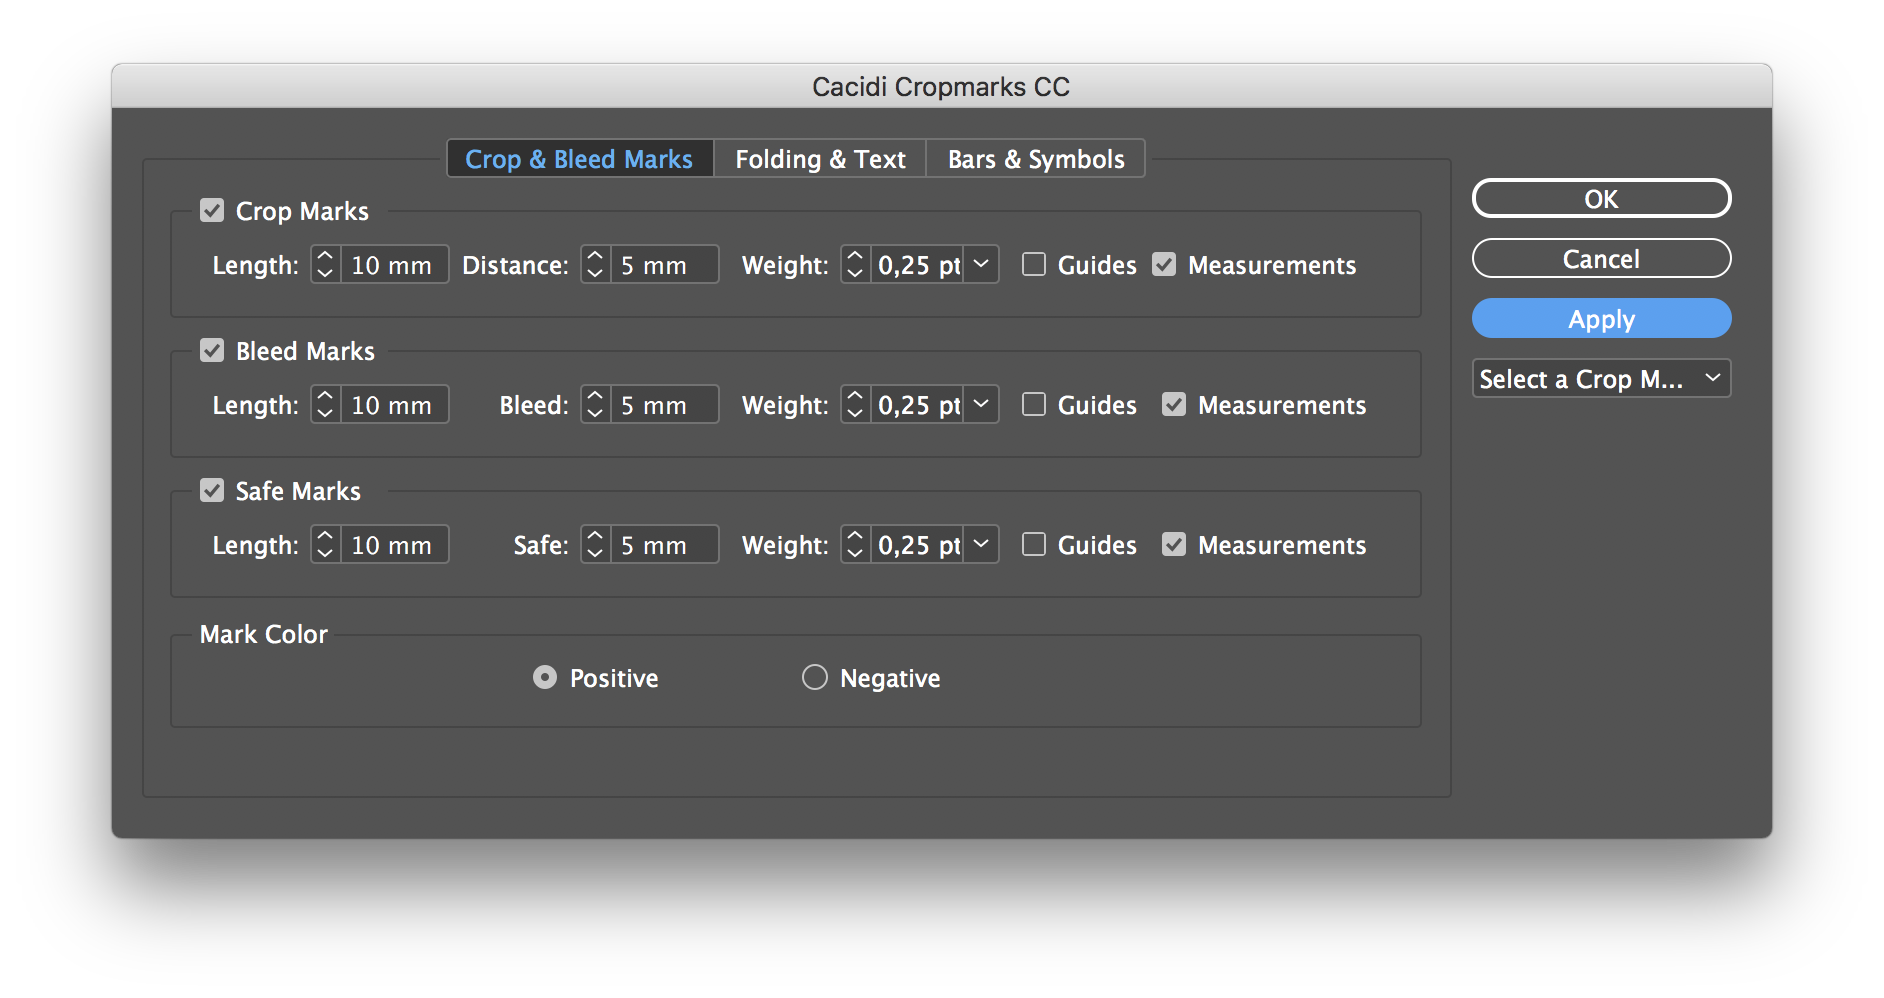
The Crop & Bleed Marks Panel
This panel gives the ability to decide if you what Crop marks apply to the selected object, how long the marks should be and even the distance to the object and the stroke weight can be decided. Even a guide and full measurement can be added. The same guide for the Bleed marks and the Safe marks. The Bleed marks is marks that will go outside the selected object, to let you have extra material on your production. The Safe marks indicate where the element should be the position of the products where it is safe to be within the selected object.
In this panel you also decide if the marks should be positive or negative – should the marks be black (Registration Color) or white (Paper Color), depending on your design. This setting will also have an effect on the registration marks.
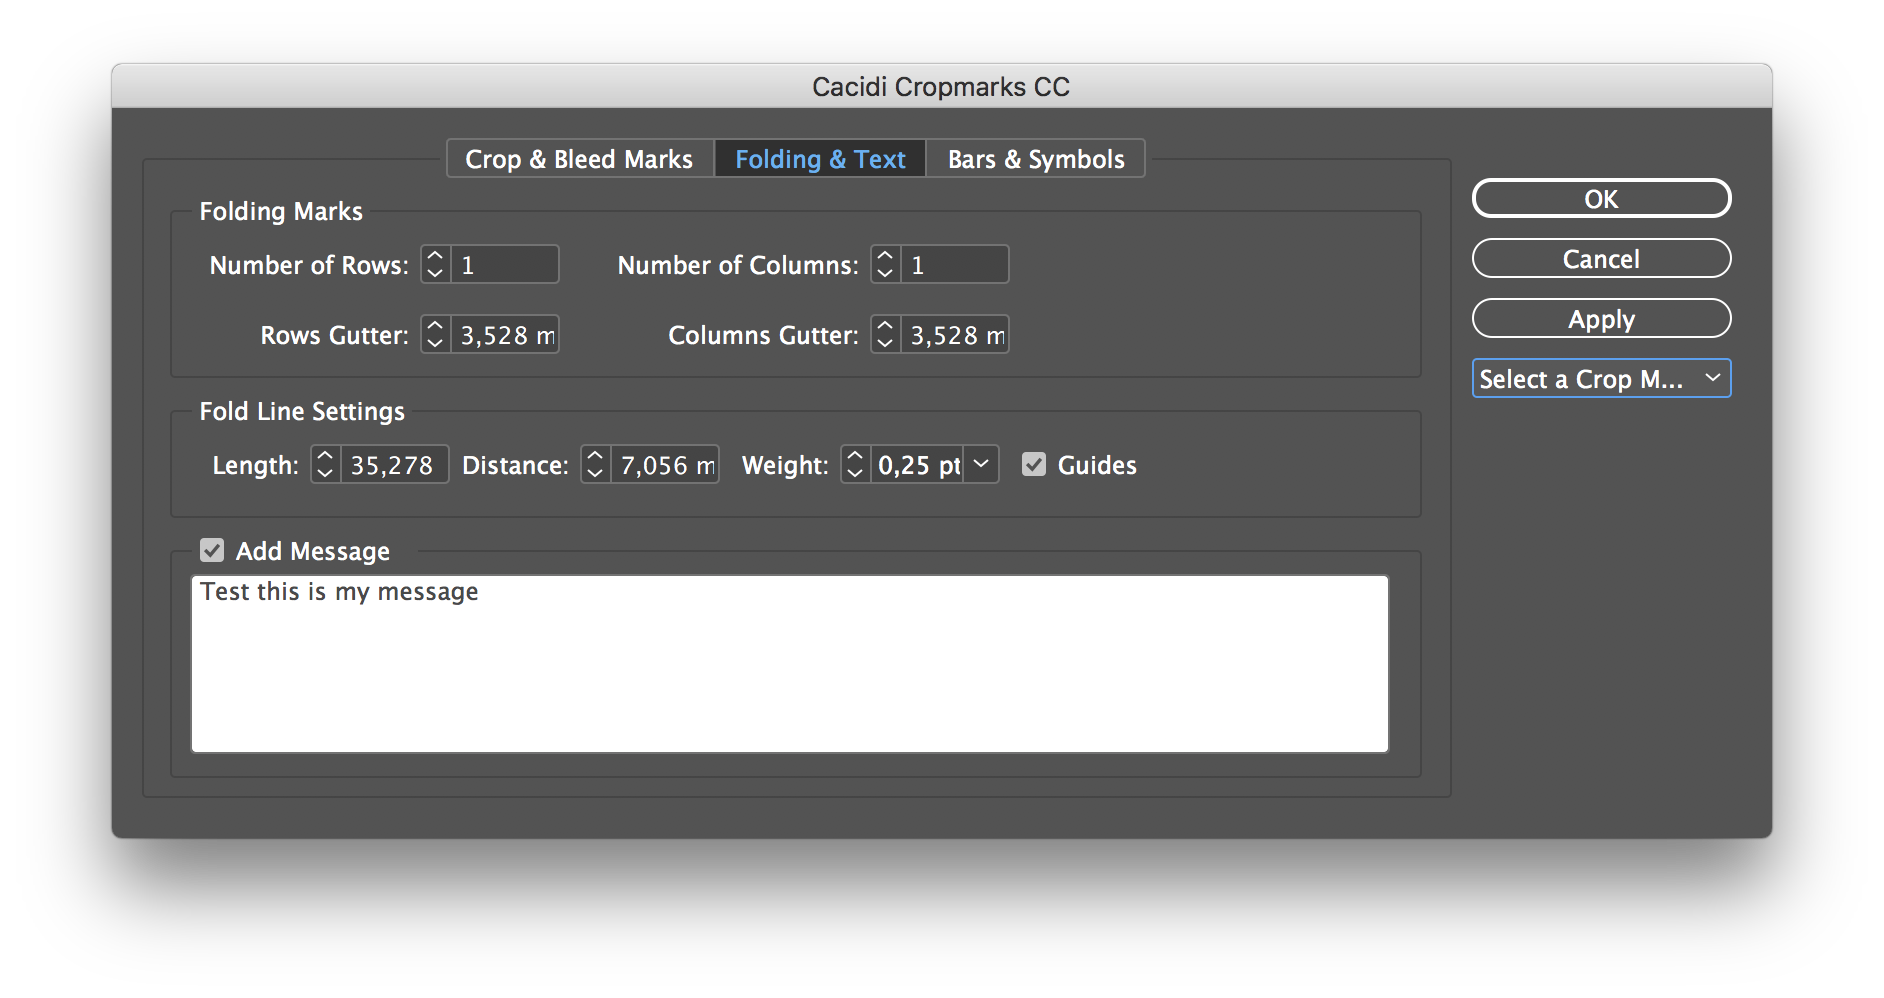
The Folding & Text Panel
The Folding & Text panels give the opportunity to apply Folding marks, based on a grid and add a text frame with e.g. contact information.
You decide the number of Rows and Columns on the selected object, set the gutter and a grid on the object will be created. The Folding marks itself will be in dash line, with an arrow indicating where the fold should be. Gutters is shown with a dash line without arrows. The Length, Distance to the object and the stroke weight can be chosen, in combination with guides, gray color for gutters, red for folding lines.
The Text frame is placed at the bottom of the selected object, and can contain any kind of text info. The default text settings of the document are applied e.g. the text style and font size.
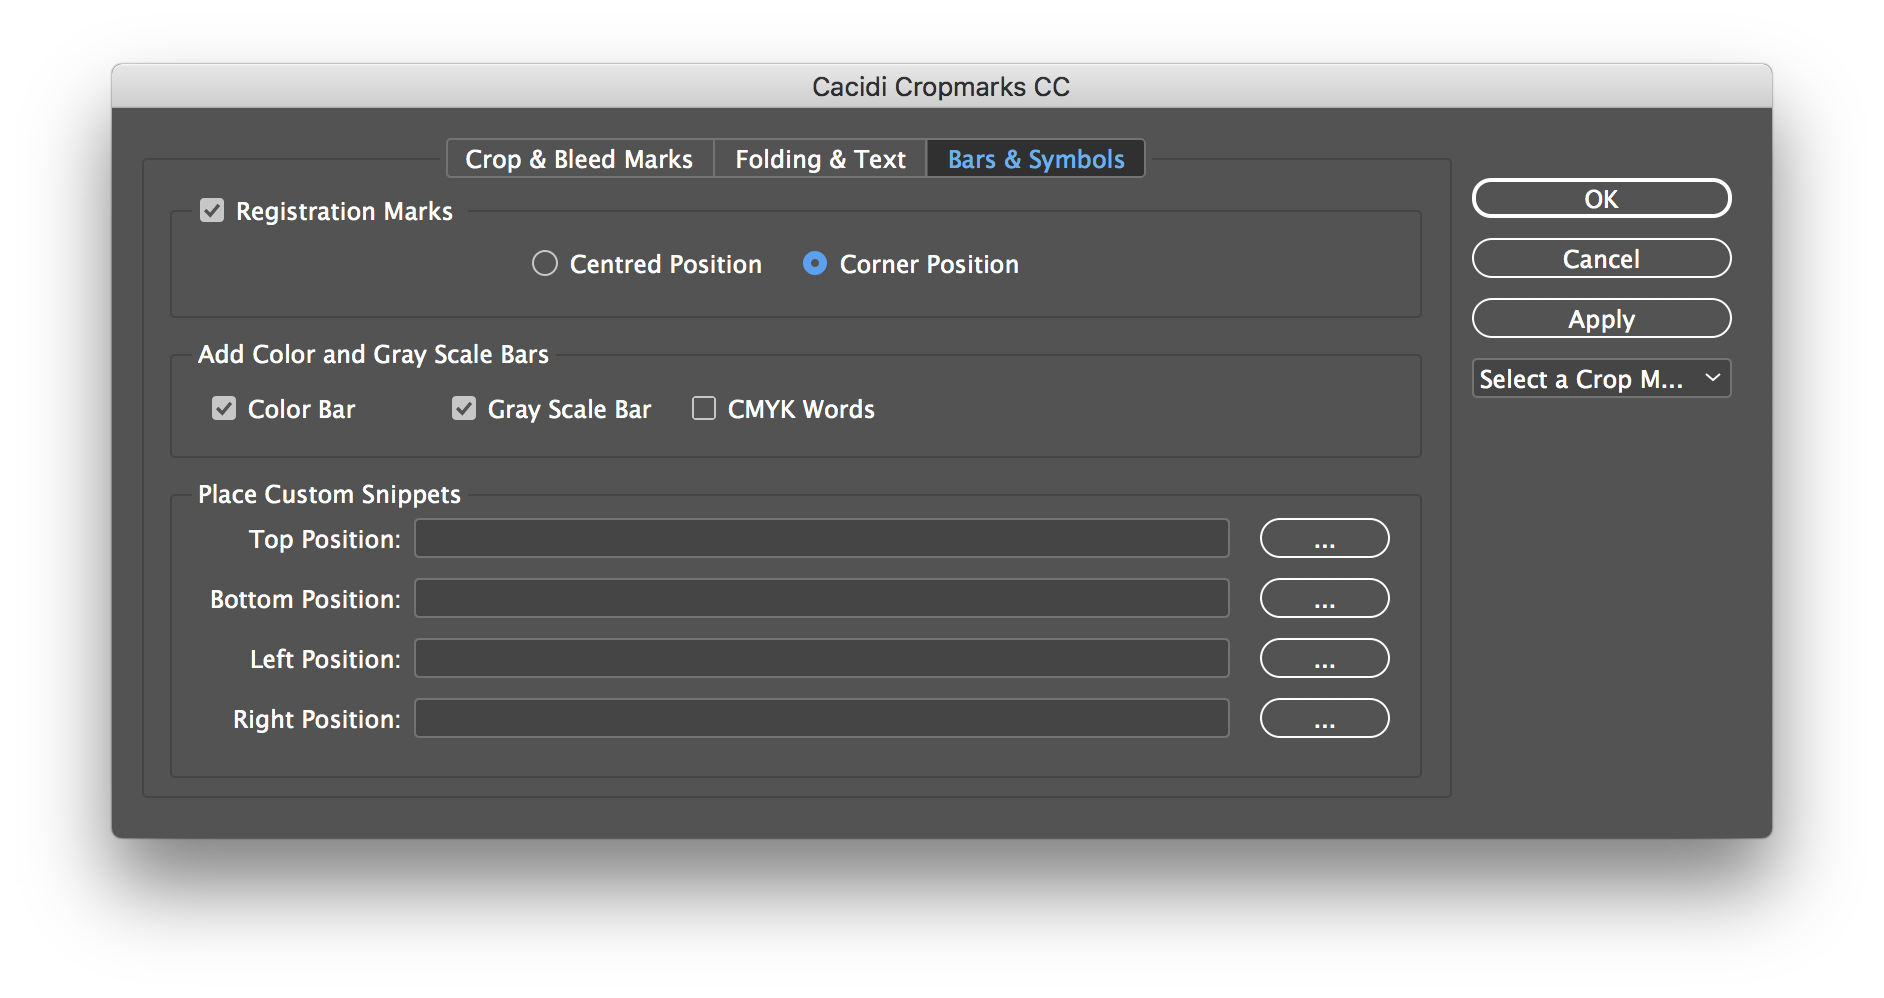
Bars & Symbols Panel
For Registration marks can they chosen Centred or Cornered Position, of course they will be affected of the Marks Color information Positive or Negative – applied on the Crop & Bleed Marks panel.
The Add Color and Gray Bars cover not only the Color and Gray Scale bars, but also CMYK words and measurements.
The Color Bar function creates a bar with yellow, magenta, cyan, blue, red, green, black and then 50% versions of yellow, magenta, cyan and black.
The Gray Scale bar contains of 11 patched from white to black graduated in steps of 10% each.
CMYK Words will create a text frame with the words Cyan Magenta Yellow Black, each word will be separated to separate plates if you are doing 4-color CMYK process.
Place Custom Snippets
To use the Place Custom snippets, create a snippet with the graphic you want and save the snippet to your hard drive – you can use the InDesign Export or just drag the elements from the page of InDesign to your hard drive.
Each of the file path can be used to import a snippet, and the position of the placed snippet will be top/left, for the Top Position, top/right for the Right Position, bottom/right for the Bottom Position and left/bottom for the Left Position.
Saving a setting
To save a setting is easy, just make all your settings, choose the “Select A Crop Marks Settings” pop up menu, and select “New Settings”, if you are modifying an existing setting the Name dialog will suggest the old name, if you want to overwrite the old one, just let the old name be and press OK, if you want the setting to have a new name, replace the suggested name with a new name and press OK.
Ease of use
Cacidi Cropmarks is very easy to use, create a setting you like as described on top, and press the Apply button in the Cacidi dialog box, or just select the Apply Cropmarks, in the menu Object->Cacidi Cropmarks.
To apply crop marks, just select an object, or multiple objects and crop marks will be applied to the object/objects.
All elements will be placed on a specific layer, and locked.
Does this script take into account the proximity of other objects when drawing crop marks? If I have a 12up sheet of business cards and use the CropMarks javascript that comes with InDesign I get 4 crop marks around each business card. Then I have to delete all of them but the crop marks around the outermost 10 business cards. If your script avoids that it would likely be worth the money.
The Cropmarks plugin will create marks around the selection
/Richard