Setting up a MySQL Connection
Refer to the MySQL servers documentation for details on this process.
You should also know the IP address and port number of the server machine running the MySQL service as well as a username and password with sufficient access to perform administrative actions on the MySQL database or databases that you will be working with.
As default, the username for the MySQL server is root with a blank password.
If the MySQL service is running localy on the same computer that also runs Cacidi Dynamic Web, the IP address is 127.0.0.1 or simply localhost and the default port number is 3306.
The dbinfo.php file
Along with the installation of Cacidi Dynamic Web a specific file for handling the database connection with the MySQL server has been created with default settings for a local MySQL service with a blank root password. If your settings for the MySQL server differs from this, you will have to open up the dbinfo.php file and edit its contents in a normal text editor (Text Edit or similar on a Mac and Notepad on Windows).
Locate the dbinfo.php file in the directory directly above the directory where the Cacidi Dynamic Web files are installed, typically called CDW or CacidiDynamicWeb. Open dbinfo.php in a text editor.
Enter the correct information for your MySQL server in the $data_IP, $data_User and $data_Pass fields, save and close the file. The changes will take imediate effect on the Dynamic Web server.
Notice also that you can change the default encoding for the MySQL database tables in this file. Leave these settings as the default unless you are absolutely sure on what you are doing!
SQL Setup
Log in to Cacidi Dynamic Web as SQLAdmin / 1234.
Click on admin in the menu bar and choose SQL Setup. This gives you access to the MySQL menu bar: SQL upload. SQL connection, SQL list view, SQL record view, SQL export and view SQL data.
SQL upload
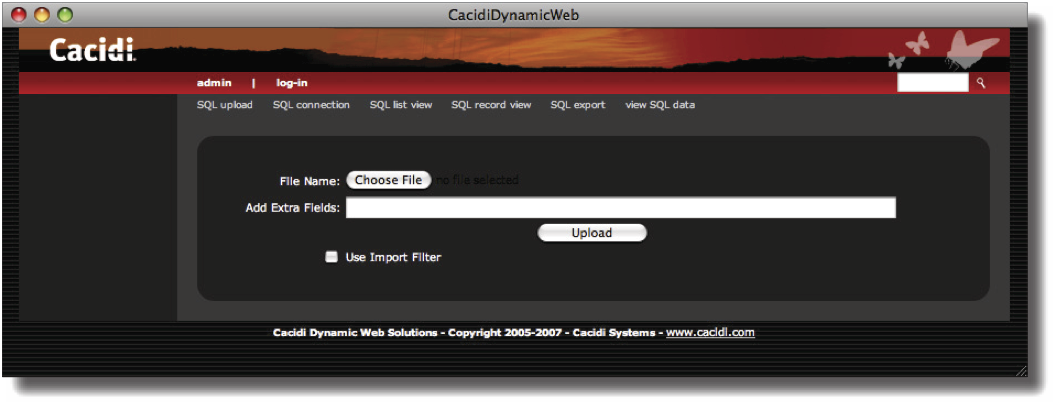
Click on SQL upload to access the upload window where you can create a new database and table based on a textfile.
To set up a database based on information in a tab separated text file, click the Choose File button to locate the text file. Any tab or comma separated text file of your choice can be used to create a MySQL database. The text encoding of the file should be standard ANSI based on your operating system (Mac OS Roman for Macintosh based computers and Windows Latin 1 for Windows based PC's).
Additional fields can be added to the database upon upload, beside those already defined in the text file. Do this by entering the field names you require separated by a comma in the Add Extra Fields entry field. If you do not wish to add extra fields, leave the entry field blank.
Click Upload and the textfile will be uploaded and a new database on the MySQL server will be created and named by the name of the textfile.
The Import filter
Cacidi System can develop specific functions that can be applied to the textfile during upload. If such an option are available for you, check Use Import Filter before uploading the text file to the database.
SQL connection
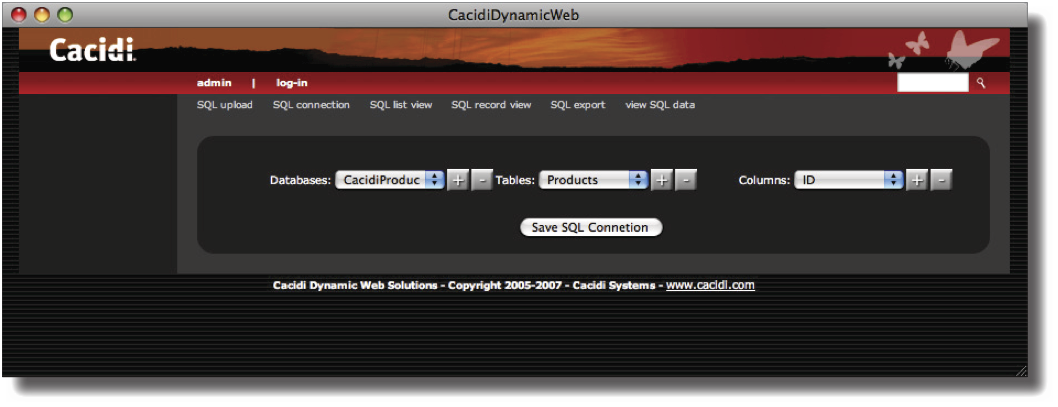
Click on SQL connection to get a view of the databases and tabels currently availbable on the MySQL server.
After uploading a text file and creating a data table, you should create a connection to the new data table from the SQL connection window in order for LiveEditor to gain access to the data table.
You can also specify new data connections to other existing tables and thus maintaining more than one data table from a single client group.
From the Databases menu, all databases on the server are listed. Select a database from the menu to view the tables in this database in the Tables menu. Select the desired table. Finally, having selected a database and a data table, you can view the headers or structure of the data table from the Columns menu. When a table is first created from Cacidi Dynamic Web, a unique ID field is always created as the first data field. Select this ID field from the popup menu to specify that this data field should be used for the SQL connection.
To add or delete a database, a data table or data columns, click on the plus or minus button respectively. Use this function to add additional data fields to an existing data table.
Warning! Deleting a whole data base from the Databases menu will delete all connected data tables associated with the data base.
Clicking on Save SQL Connection will save the currently selected choices as a new Data table connection and will give the editing features of Cacidi Dynamic Web access to the specified data table.


