The Page Designer
The Page Designer allows the user to compile individual modules into a full layout in a graphical view mode.
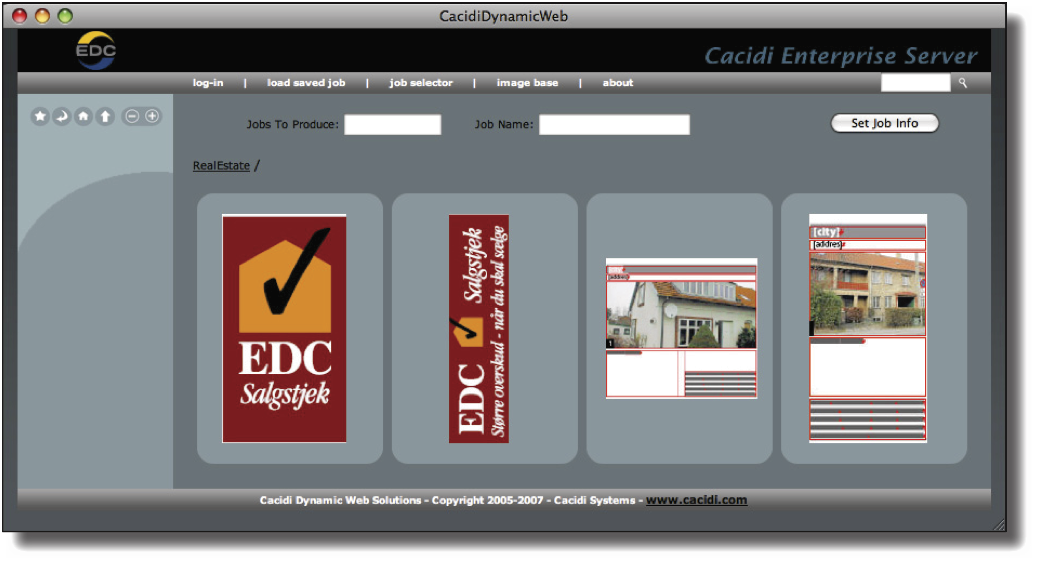
Log in to Cacidi Dynamic Web as RealEstate with password RealEstate. You will be presented with the following Job selector window:
Now, for the purpose of building one full tabloid size newspaper advertisement including 20 house sales, enter 20 in the Jobs to Produce field and My20Houses in the Job Name field and click Set Job Info.
Then, click on the RealEstateSingle design to set this as the master design for all 20 items.
Again, you will be presented with the Job Builder already prepared for entering information into 20 items. By clicking the numbers at top left, you can navigate directly to the item you wish to modify.
Click on the Page Designer button to enter the graphical view of the Page Designer.
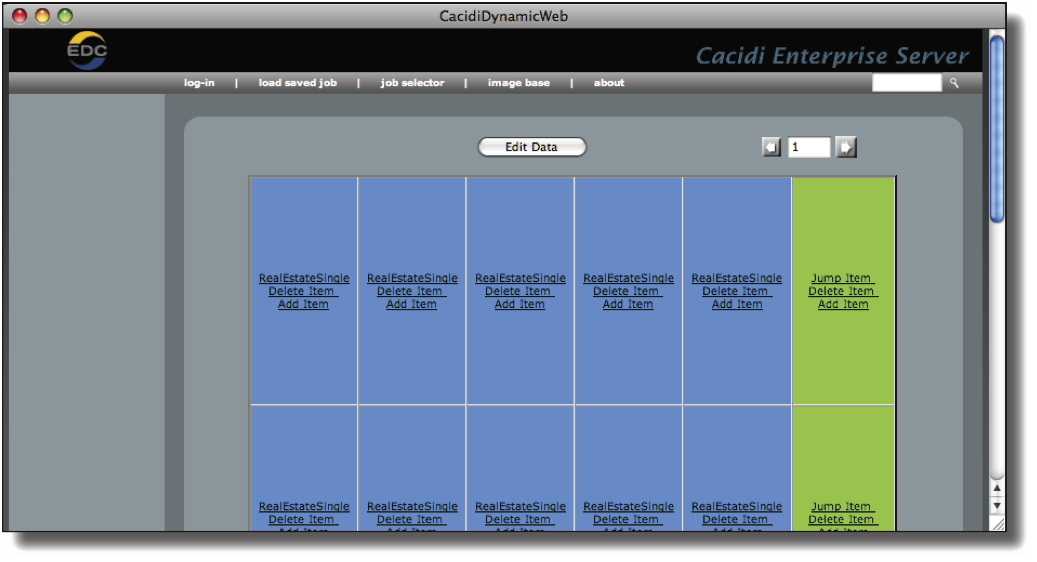
Notice how, in a 6 by 4 grid, 20 tiles are blue and have the design RealEstateSingle applied to them. In the right column, the four tiles are green with no design applied to them (remember, that we're are only producing 20 designs).
The tiles that make up the page design are created from the Page Grid in the Job Settings window (see above). This grid is also saved with the design and the template upon which is being build and as thus are represented as a default value. In this example, the default grid is 6 by 4, as shown.
Each tile in this grid can have one of the following colours:
Green: A green tile is skipped meaning that nothing is being placed in this location.
Blue: A blue tile represents a design that is being applied to the tile.
Additionally, each tile has three links:
Jump Item (or name of Design): For an empty (green) tile, Jump Item will jump to the Job selector where you can select a design to place in this tile. For a blue item, the link is named the same as the current. Clicking the link will allow you to choose another design for this tile.
Delete Item: Clicking this link will delete the tile, moving the other tiles accordingly.
Add Item: Clicking this link will add an empty (green) tile pushing the tile you clicked in down (and rearranging the rest of the tiles accordingly).
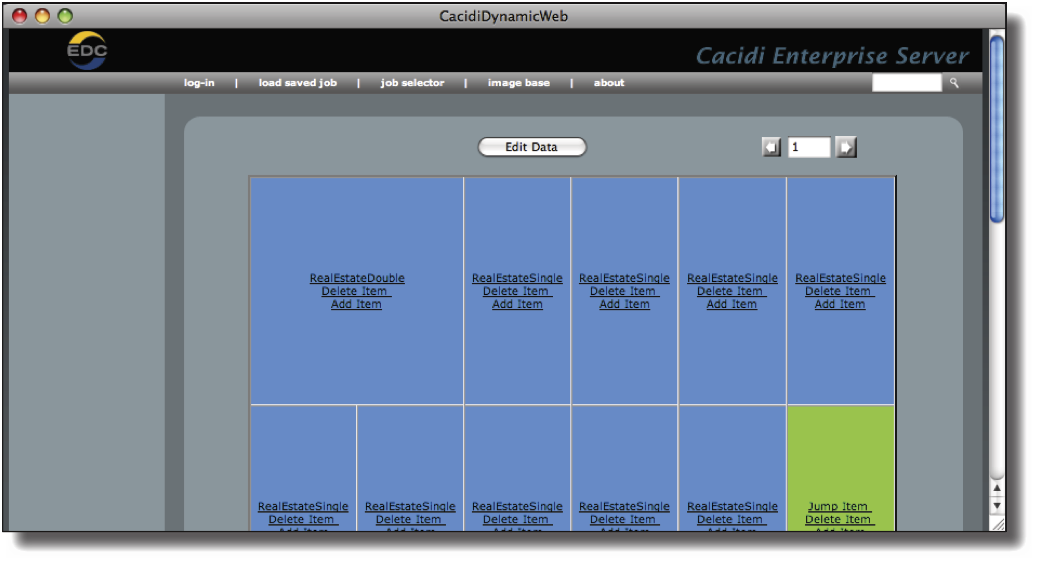
To replace the top-left design with another, click on the RealEstateSingle link in the top-most blue tile. You will now be at the Job Selector window. Here, click on the RealEstateDouble design.
Notice, how the Page Designer reflects the new design you chose for the top-most tile since the RealEstateDouble design has the double width as the RealEstateSingle.
Now, continue the procedure and change as many designs as you like, until you have all tiles in the layout filled in. Then, click the Edit Data button to return to the Job Builder where you can add content to the layout.
The Upload Text Data button
Instead of entering information for each of the designs in the Job Builder, you can upload a text file containing all the information as a delimited text file. To upload such a text file into the job, click the Upload Text Data button.
You will be presented with the standard upload window of Cacidi Dynamic Web. Click Choose File and browse for the RealEstate.txt file (this text file is typically placed along with the server installation).
Press Upload and the correct information for all 20 houses has been entered automatically.
Next, click Create Job and in a matter of seconds you full size tabloid ad has been created with the design you defined from the Page Designer.
Edit Job / Update Job
Having created a job and being presented by the preview of the finished job, you can choose to press Edit Job to return to the Job Builder. From there, as long as you don't change anything other than the text in the design fields, you can press the Update Job button (which will be available at that time) to update the text content of the previously crated job. An update production is much faster than an actual creation but as soon as you change the design or number of items on the job, the Update Job option is no longer available and you will have to recreate the job again.
Working with Images
Any design can have one or more image that is considered dynamic as a part of its design. Dynamic images are shown as an edit field containing the path to the image along with a button to browse for another image in the Image Base.
Working with other file formats
Any design created from Adobe InDesign with Cacidi Extreme can contain one or more text frames prepared to contain for example rich text from a text file, Microsoft Office Words documents and Microsoft Office Excel spreadsheets.
See the Cacidi Extreme User manual for information on how to apply these options to an Item Design.
In Cacidi Dynamic Web, when such a design are being produced, the text frame that should contain a special file format are displayed in the same way an image frame is (see above). Clicking on the Browse button will likewise open up the Image Base but instead of selecting an image, you can now select any other file format that is supported by Adobe InDesign.
Create predefined Object Styles within InDesign and apply those to the text frame to format the contents properly.
Using the Image Base you can upload these files to the client group.


