What is an Item Design?
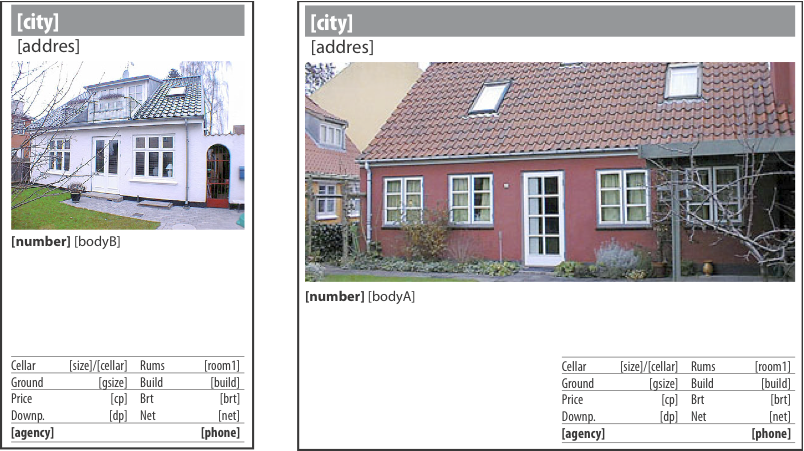
An item design is a collection of text, image and decoration fields. Each item may have its own unique design and an item will often correspond to a database entry.
When you create an item design, it is important that the Item Design corresponds to the database field definitions in the projects Data Source.
Create an Item Design
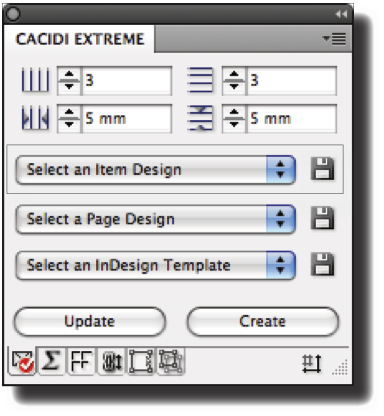
To create a simple Item Design, just create a textframe anywhere on the pasteboard, put some text into it and select it. Then click on the disc icon next to the Select an Item Design pop-up menu to save the selected Text Frame as a new Item Design.
Delete the text frame from the paste board and select the newly created Item Design from the Select an Item Design pop-up menu to bring your Item Design back onto the page. Notice that the exact position of the Item Design is saved, relative to the top-left corner of the page margens, thus placing the Item Design back into the same position as when you created it. Now, try to add more obejcts to the Item Design by simply creating them using any of the tools available in InDesign to create graphical layouts. Add text to the text fields and style it by using the InDesign styling formats. You can work with every other property that InDesign has. When you're done, select every object you want to save as one Item Design and click the disc icon once again to save the Item Design.
Make an Item Design dynamic
Cacidi Extreme uses something called data merge fields marked by text brackets [ and ] to tell whether a text should be dynamically selected from the Data Source or whether it should be static text that doesn't change during production. Click on the Text Link panel in the Cacidi Extreme to get a list of available data fields from the current Data Source.
To enter a data merge field into a text frame, place the cursor within the frame where you want the dynamic text to be and click on the data field in the Text Link panel. The data field will be automatically entered surrounded by [ and ] thus creating a data merge field. Character and paragraph formats applied to the data field in the text frame will also be applied to the dynamic text that replaces the fields in the item designs during production.
Images are made dynamic in a like wise manner: Create an image frame, select it and click on the appropriate data field from the Text Link panel. To confirm the image frame has the correct data merge marker, select the image frame and click on the Frame Settings panel. In the Image merge field (right off the camera symbol) the data merge marker for the image frame should be entered.
Save an Item Design
Select every object that should make up your Item Design and click on the disc icon to the right of the Select an Item Design pop-up menu. You should save the design in the Design folder for the current project, as defined by the Project Settings window. Name the item design appropriately, e.g. by including the tile size like this: 3x3 letter - Dual. See below for guides to naming an Item Design.
Rules for naming an Item Design
Generally, any name you choose can be used for saving an Item Design. The file extension for the Item Design is the Adobe InDesign snippet extension format, .idms.
It's normally a good idea to name your Item Designs according to their dimensions in the Page Grid (see page 24), thus 1x1.idms, 1x2.idms and 3x2.idms are good names for Item Designs that takes up a 1 by 1 tile, 1 by 2 tiles and 3 by 3 tiles in the Page Grid respectively.
By adding -1, -2, -3 etc. to your Item Designs name, you can tell Extreme the height in number of rows in your Page Grid each Item Design has. This indication is used for some of the advanced calculated catalogue production methods as listed on page 4 and page 29.
By adding -L or -R, to you Item Designs name, you can control specific left/right page positions. Name your Item Designs myname-22-L for a design taking 22 tiles designed for left page positioning.
An Item Design in a Item Design
You can have a Item Design in a Item Design, by using a marker as a placeholder for the part of an Item.. The benefit for using an Item Design in a Item Design are that if e.g. your design are a product design, and the price splash are used in many Item Design it can be a great thing to isolate it in a specific design.
This is how you do; create a price splash and save the price splash in a Item Design, then create the rest of the design. On the spot where you want the price splash to be, create an unassigned frame, select the frame, and in the popup menu Select an Item Design select your price splash. The status of that object are now a carrier for the Item Design in a Item Design. Select all the elements of your Item Design and save it.


